Leeds Beckett University - City Campus,
Woodhouse Lane,
LS1 3HE
Respondus 4.0: Edit tests offline and upload to modules
Page last updated:
You can create tests / exams offline, print them and/or import them into MyBeckett modules using Respondus 4.0 software, available in the Software Centre on your university computer. This saves you a lot of time when creating large tests.
Find out more from the Respondus website.
To install Respondus 4.0 on your University PC or laptop:
a. Click the Start menu and type Software Center into the search box. Click Open.
b. Search for Respondus 4 then click the Install button.
c. If prompted, type the license details:
- Institution Name: Leeds Beckett University
- Local Support Contact: Digital Learning Service – 25410
- Installation Password: Log in with your staff username and password to view the license code (this is updated every summer, and is valid until the end of the following July)
d. Click License.
e. In Choose LMS Personality, select Blackboard, then click OK.

To use Respondus on your personal (home) desktop or laptop, please:
b. Once it's downloaded, extract the zip file (right click on it, then click Extract All...
c. Double click the Respondus4Campus.exe file and follow the on screen instructions.
To install Respondus 4.0 on your University PC or laptop:
a. Click the Start menu and type Software Center into the search box. Click Open.
b. Search for Respondus 4 then click the Install button.
c. If prompted, type the license details:
- Institution Name: Leeds Beckett University
- Local Support Contact: Digital Learning Service – 25410
- Installation Password: Log in with your staff username and password to view the license code (this is updated every summer, and is valid until the end of the following July)
d. Click License.
e. In Choose LMS Personality, select Blackboard, then click OK.
a. In Respondus 4.0, click the Retrieval & Reports tab.

b. Click Retrieve Questions in the left menu, then click the Retrieve Questions button.
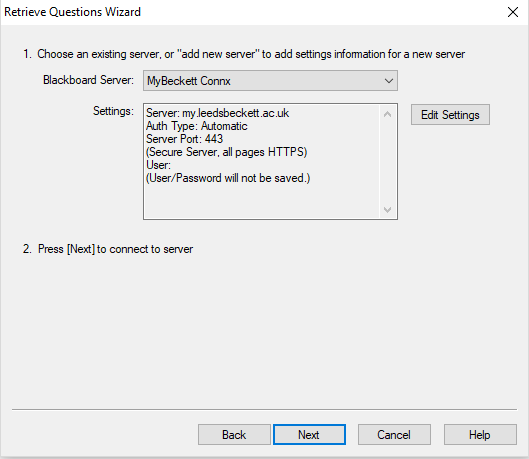
c. In the Retrieve Questions Wizard, under Blackboard Server, select - add new Server - from the drop down box.
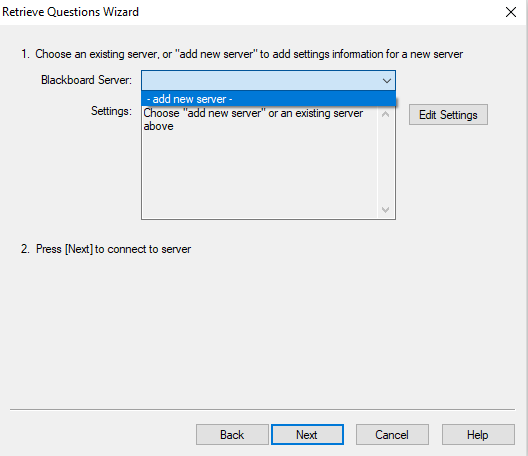
e. Important: On the next screen, don't enter anything in sections 1 and 2.
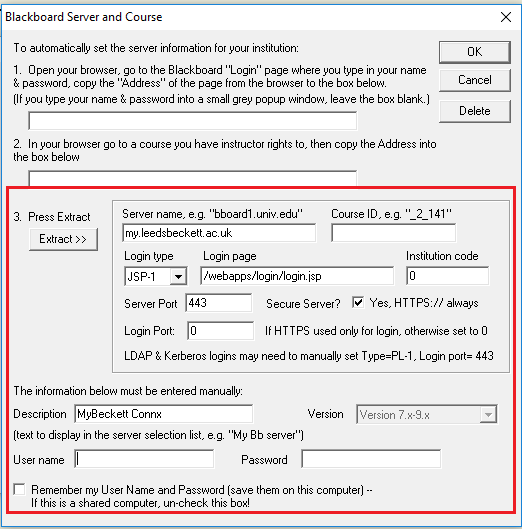
f. In section 3, add the following information only (don't enter anything we haven't specified) and click OK:
Server name: my.leedsbeckett.ac.uk
Login type: JSP-1 (select from the drop-down menu)
Login page: /webapps/login/login.jsp
Institution code: 0 (zero rather than letter O)
Server Port: 443
Secure Server?: Tick the box
Login Port: 0 (zero rather than letter O)
Description: MyBeckett Connx
Username: your staff username e.g. staff01
Password: your University staff password
g. Click Next.
h. Click Cancel.
From now on, when you want to connect to a MyBeckett module, you only need to select the connection name. (Important: You only need to complete this process once, after installation)
Video Guides to support you in using Respondus:
- Full Respondus video guides are available on their website
- Creating and Formatting Questions in Respondus
- Importing questions video tutorial
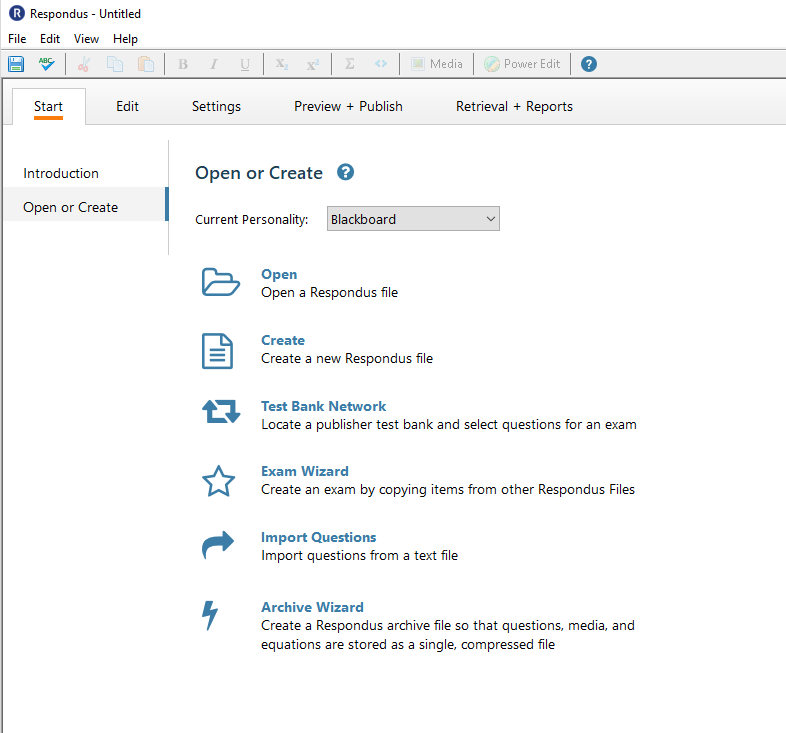
a.Open the Respondus app.
b. Click the Start tab, then select Blackboard from the drop-down menu.
c. Click the Retrieval and Reports tab, then click Retrieve Questions on the left menu.

d. Click the Retrieve Questions button to access the wizard.
e. Click the Blackboard Server drop-down menu and select MyBeckett.
Important: If MyBeckett isn't listed, please refer to section 5 of this page.
f. Click Next and Next again. You may need to enter your Username and Password.
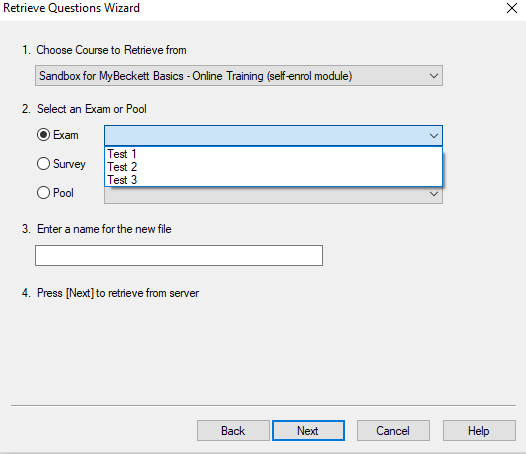
g. Select Choose Course to Retrieve from (i.e. select the MyBeckett module you want to get questions from).
h. Select the question type you want to retrieve: Exam (Test), Survey or Pool
i. Use the drop-down menu to select a specific Exam, Survey or Pool.
j. Enter a name for the new file and click Next. (this is just for reference and is used only by Respondus).
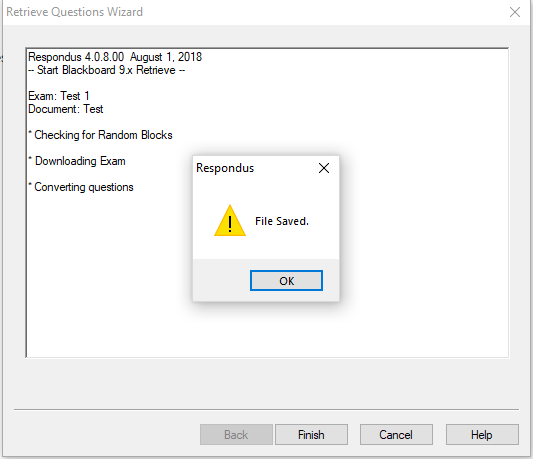
k. During the question retrieval process, a File Saved message appears. Click OK. The process continues until Completed Successfully appears.
l. Click Finish. To view the retrieved questions, click the Edit tab.
a. Open Respondus.
b. Click the Start tab, then select Blackboard from the drop-down menu.
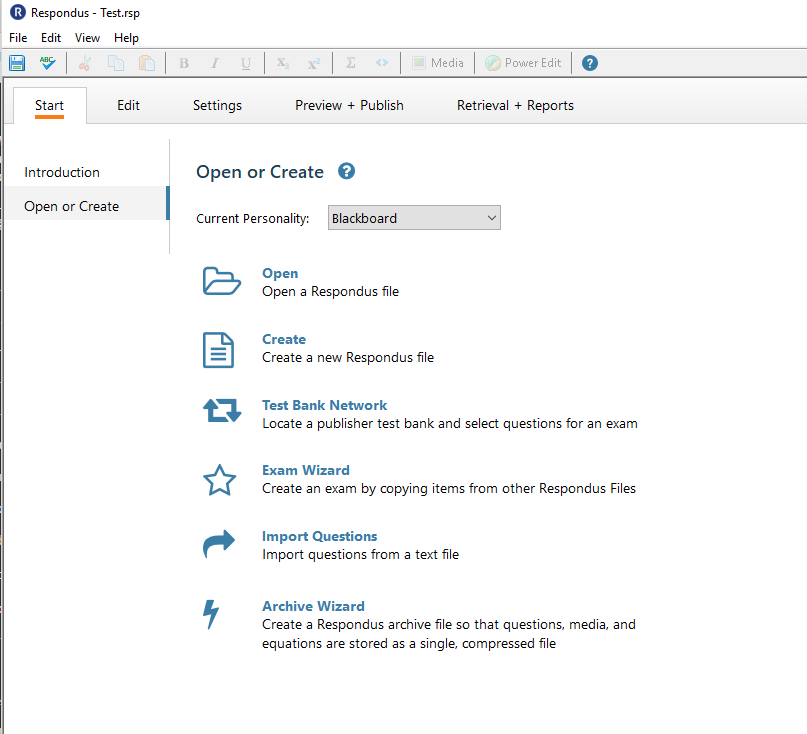
c. Click the Open button and choose a previously saved Respondus file, or click the Create button to create a new file. If you create a new file, you need to type a Name, Description and select the Type of File, either Exam (Test) or Survey. Then click OK.
d. The Edit tab opens. If you opened a previously saved file, the questions are listed at the bottom and can be edited or printed. If you created a new file, you can start adding questions. For more information, view the video guides in section 6 of this page.
e. When you're done adding / editing questions, click the Preview & Publish tab, then click Publish to Blackboard in the left menu.
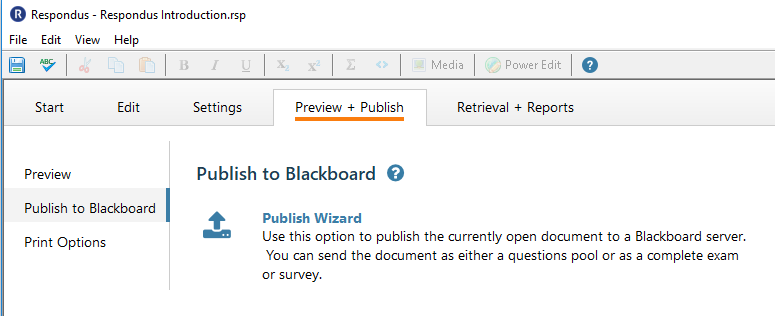
f. Click the Publish Wizard button.
g. Select the Type of Publish. We'll describe the Publish to single course (module) option.
h. Under Choose an existing server, select MyBeckett.
Important: If MyBeckett isn't listed, please refer to section 5 of this page.
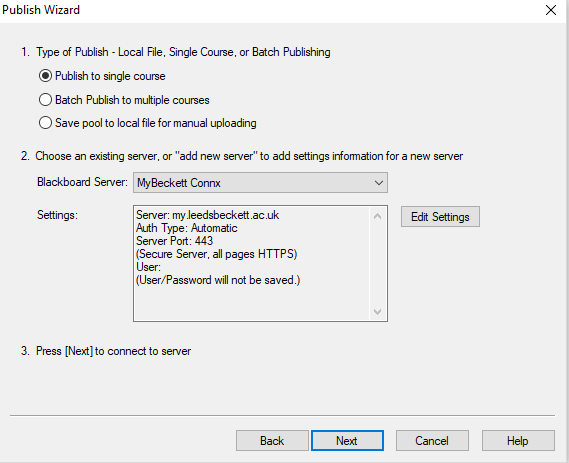
i. Click Next.The Publish Wizard offers more options.
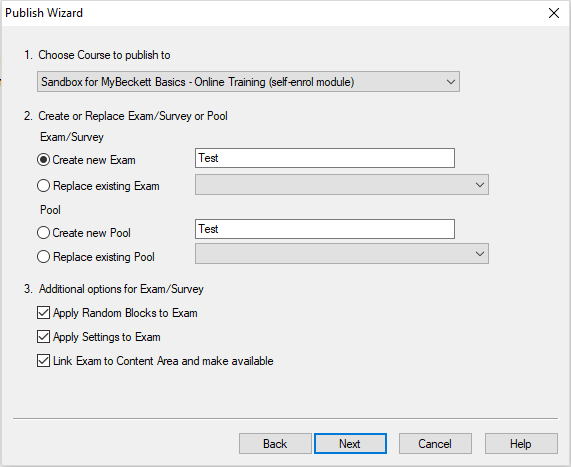
j. Under option 1. Choose Course to publish to select the module you want to import the test into from the drop-down options.
k. Under option 2. Create or Replace Exam/Survey or Pool, select whether you want the imported test / pool to be a brand new test / pool within the module, or whether you want to replace (overwrite) an existing test / pool.
l. Type a name for the test / pool. This is the name of the test published in the module.
m. Under point 3. Additional options for Exam/Survey, choose these:
- (optional) Apply [any pre-created] Random Blocks (if you don't know what these are it's safe to say you can un-check this).
- Tick to Apply Settings to Exam if you want to reuse existing module test settings.
- Tick to Link Exam to Content Area and make available to place the test in a module content area. Ensure the content area exists in the module. You'll specify a location in the next step.
Important: If you un-check all three options, the test is still imported into your module and stored in Control Panel / Module Tools / Tests, Surveys and Pools Tests You can deploy the test to a content area later.
n. Click Next.
o. Select the content area in which you want to place the test. Click Next.
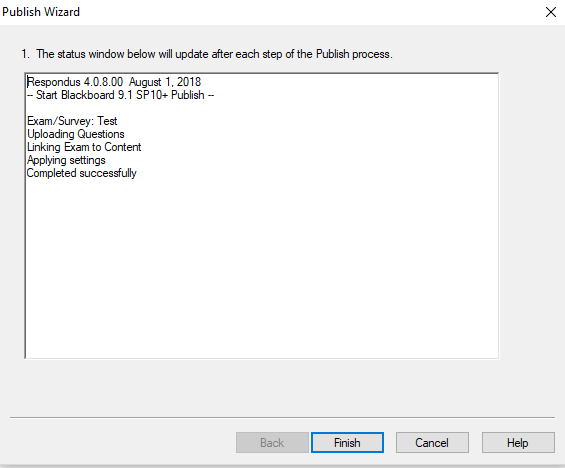
p. A series of messages appears in the Publish Wizard. When Completed Successfully is displayed, click Finish.
Important: Go to the module in MyBeckett. Your test is displayed in the content area you selected. Please check it before communicating its availability to students.
