
Leeds Beckett University - City Campus,
Woodhouse Lane,
LS1 3HE
set up a ms teams online meeting from mybeckett
Page last updated:
This is a staff guide to setting up a MS Teams meeting in MyBeckett module.
Microsoft Teams integration in MyBeckett is no longer available from 15 September 2025.
There are two options to create a Teams meeting:
- Class Teams Sites - This is using Teams directly rather than in MyBeckett (but you may copy the joining instructions into your module). To use this functionality with your students added, you need to be invited to an existing Class Teams site or request a new one via the IT Self-Service Portal.
- Microsoft 365 Teams app - You do not need a MS Class Teams site setting up in order to use the online meeting tool with your students. You can use Microsoft Teams from your personal Microsoft 365 account and post the link in your module.
We recommend that you set up an online meeting directly via MS Teams.
Once you have created a Teams meeting from your Personal Microsoft 365 account, you will copy the joining link into a content item within your module.
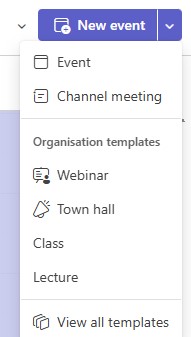
There are several templates to choose from in Teams, to see the options and limitations select view all templates. Selecting 'Class' template may be the best choice.
Once you have created a Teams meeting and copied the joining link into your module. You may wish to add some more detail to the meeting description in the Content Item, such as instructions for your students.
a. Hover over the content item with your meeting link and click the action link that appears to the right.
b. Click Edit.
c. Scroll down to the Description section, then type your instructions. (before or after your meeting joining link
d. Click Submit.
Edit the meeting link
You can also join the meeting via the link copied into your module to edit the meeting settings at any point after creation.
a. From within your module content area joining link or in your Outlook Calendar
b. You may change settings to preventing students joining automatically by setting up a Lobby Waiting Area, this gives you control of who and when can join the meeting.
If you want to move your meeting link into a different content area within your module, you can do this in the same way as other content items. Just make sure it is easy for your students to find.
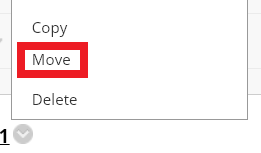
a.Hover over the meeting link and click the action link that appears to the right.
b. Click Move.
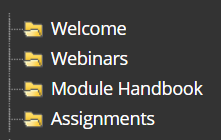
c. Click the Browse button next to Destination folder.

d. Choose the content area that you want to move the meeting link into. This list will look different for every module, depending on the content areas you have added to your module menu.
e. Click Submit.
If you need to cancel a meeting, you can delete it. Make sure you also inform your students as they won't get a notification about this.
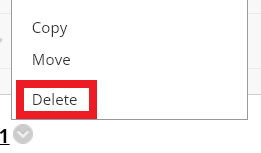
a. Hover over the meeting link and click the action link that appears to the right.
b. Click Delete.
Start a meeting as normal, the meeting organiser will now have access to the breakout rooms button on the meeting control bar.
Please Note: Difference of the breakout room icon on Windows/Mac
![]()
How do I make sure I can start using breakout rooms?
-
Make sure that the new meeting experience is enabled go to Teams -> Settings -> General -> Check “Turn on new meeting experience” (IT Services can support you with this task)
-
Check and make sure you have the latest Teams updates (Update Microsoft Teams - Office Support)

a. Create Breakout rooms
Select Breakout rooms icon and choose how many rooms you would like. Select whether to automatically or manually assign your participants then select Create Rooms. To give each room a name, select the 3 dots ... next to each room, and select Rename room.
b. Assign Participants manually
Expand the list under assign participants then select participants by ticking the checkbox on each name (hover your mouse over each name). Select the 3 dots ... and choose a room from the list. Repeat until all participants are assigned.
c. Start breakout rooms
Select the 3 dots ... next to a room name, then Open room or select Open rooms to open all rooms at once Each room will change from closed to open status.
d. Breakout rooms in progress
To Join a breakout room, select the 3 dots ... next to the room, then Join. To return to the main meeting select Return.
e. Send an announcement - to all breakout rooms
Select the 3 dots ... at the top of the breakout rooms menu, then Make an announcement.
f. Closing breakout rooms
To close a breakout room, select the 3 dots ... next to its' name, then Close room.
To close all rooms at once, select Close rooms.
g. Further information...
- You can have a maximum of 50 breakout rooms.
- Within breakout rooms, every participant can share content.
- Separate meeting chats are kept for each breakout room.
- The meeting organiser can interact with all chats.
- If a breakout room participant wants to get the attention of the meeting organiser, they can tag them in the chat using an @mention.
- If any recordings are made they will only be available to participants of the breakout room where they were recorded.
- Microsoft have promised that in future it will be possible to set more than one meeting organiser, to allow for greater control.
- Meeting organisers use the desktop client version of Teams, whereas participants can use either the desktop or mobile client, or even the web browser version.
h. Minimum Version Info...
- Minimum desktop app version: 1.3.00.24755 (released Sep 20)
- Minimum iOS build: 1.0.77.2020100603
- Minimum Android build: 1.0.0.2020091301
