
Leeds Beckett University - City Campus,
Woodhouse Lane,
LS1 3HE
CREATING FORMS | ULTRA
![]()
Page last updated:
Creating Forms in Ultra
The Forms tool in Ultra can be a useful way to gain feedback from students in your module. In Blackboard/MyBeckett Original this was under the Survey tool.
It can also be used as another assessment format if either the Assignment or Test function in Ultra would not be suitable.
For example
You could create a formative assessment that will aid the student during the module giving feedback on progress. This could help with a summative assessment at the end of the module.
It could be used to create a module evaluation/feedback form which the example below will demonstrate.
Contents
- Create a form
- Assessment settings - creating surveys or assessments
- A brief note on the form in the Grade Centre
- Adding questions to the form
-
Editing a form
- Submitting a response - student
- Viewing student submissions
Create a form
Firstly click the Plus icon in module content to open up menu and then Create:
![]()
Then scroll down the Create Item menu until you see the Form tool menu item - see second screen shot:


This will open up a new form where you can edit it, the first step being adding a title to it (e.g. as in the below we will edit 'New Form 17/07/2025'). The below screen shot shows the left-hand side of the screen:

Assessment settings - creating surveys or assessments
On the right-hand side of the screen is the Assessment settings where clicking on the individual links you can edit the setting, or alternatively by clicking the cog icon, you can open the listed links plus see more options:

The next screen shot details the top of the Assessment Settings dialogue box. This shows you can set a Due Date for the form which has now been renamed 'Module Feedback Pop culture 1960s'.
This example shows how to create a module evaluation/feedback form (c.f. a survey in MyBeckett Original) for students to complete and as such, it is not a marked assessment (but see the note on Grade centre below).

If a form is created as an assessment there are options you can select above, the first two have useful notes describing their function. Allow class conversations may be useful for an assessment assigned to student groups (see Assign to groups below).
The next part of the dialogue box on scrolling down is where you can set how to display questions. In Prohibit backtracking you can set it to when a question is answered it can't be revisited:

Randomise questions will mean they won't be presented in the order that they were created and this applies if multiple choice questions is chosen (i.e. the answer choices will not be presented as created).
Randomise pages will only appear to select if you choose or create the form to have more than one page (e.g. by inserting a page break after a series of questions).
Another option is that you can create the form as a Formative assessment which as the note says, you will have to exclude from the overall marks calculation in your module.
If the form will be a marked assessment
The next screen shot shows the option to mark the form selected. You can tailor the mark category (e.g. Assignment, Test etc.), set the number of attempts, marking units and also set anonymous submissions:

The last part of the dialogue box is where you can assign the assessment form to student groups and enter a description:

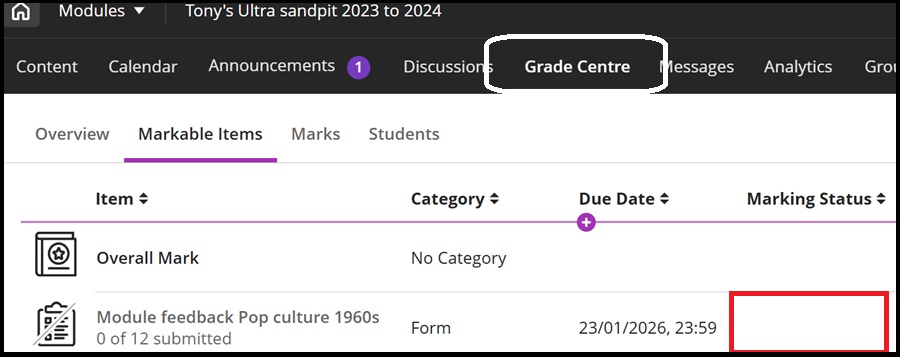
A brief note on the form in the Grade Centre
Even though our form is being created as a survey and set not to be graded it will still appear in the Grade Centre:
Adding questions to the form
In the main Contents and Settings area of your form click on the plus icon to Add a question:

This will bring up a list of question options and as before click on the plus icon against the desired category to add your first question:

As we want to create a survey type of form we have chosen a Likert scale style question:


Please note that as highlighted above you will need to type in the definitions in the Define Scale boxes (for instance, as suggested by the default definitions entered seen in the previous screen shot) as nothing will appear at each end of the scale limits to indicate what the numbers mean).
Once all the questions have been added, click Save.
Editing a form
As below the completed form can be edited either by clicking on the form name link or clicking the three dots menu and Edit:

Submitting a response - student
Below shows the process when a student submits a response to the created module feedback form.
The student clicks on the link in the content area and then clicks Start Attempt and completes the form:


When the form is complete the student will receive a confirmation email as well as a message onscreen:

Viewing student submissions
The tutor can view the submitted form when clicking Submissions in their view of the module feedback form (i.e. notified by the figure appearing):


Clicking the student submission name link as in the above will bring up the detail of their completed survey form:

