
Leeds Beckett University - City Campus,
Woodhouse Lane,
LS1 3HE
CREATING MESSAGES | ULTRA
![]()
Page last updated:
Messaging in ULTRA
Messaging in Ultra
This guide provides instructions on how to send messages in your MyBeckett Ultra module. This will be for staff to send messages to students and student groups.
You will notice that the function is only enabled for a member of staff to send messages and not for students to reply to, as this is the institution setting.
There are various places that also have the function to send messages to students as well as the Messages tab in your module.
Please note: Messages are Read Only and students cannot reply to them.
- Create a new Message
- Viewing and deleting a message
- Grade Centre and messaging
- Sending Messages in Grade Centre - Submissions
- Groups - please see the guide on sending messages to Groups
- Messages on MyBeckett main menu and Staff to staff messaging
Create a new Message
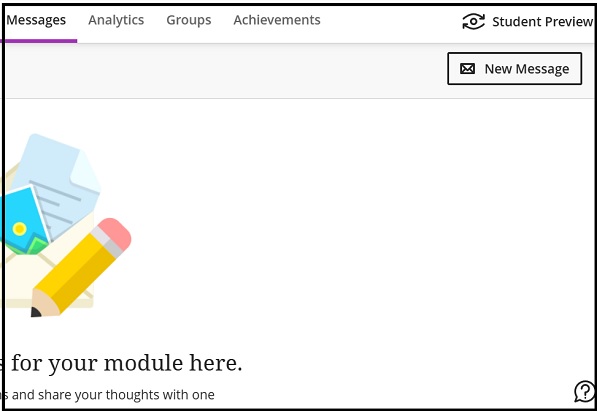
Click the Messages tab located on the top menu bar and then click the New Message button:
As noted in the introduction you will see the warning message on students not being able to create or reply to messages. In Recipients select the student(s) or groups you wish to send the message to:
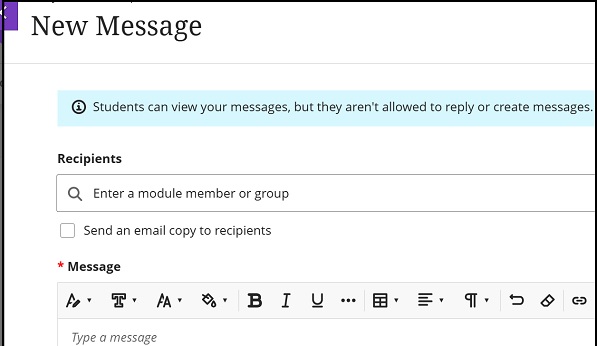
The title New Message cannot be altered (it's recommended the message subject be added as the first line of the text):
The next two screen shots show the expanded list:

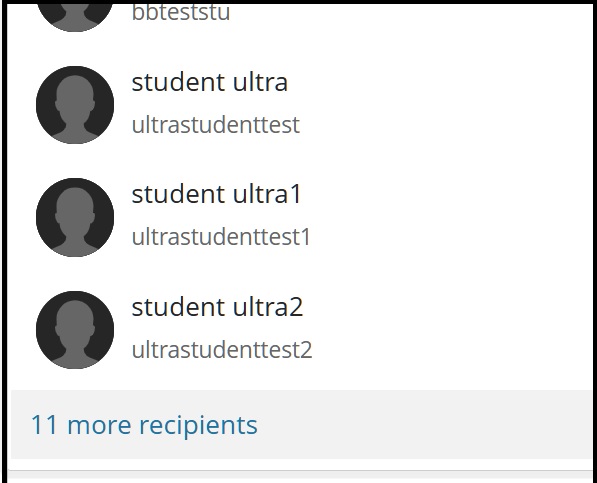
In the second screen shot we have scrolled down to select the 11 more recipients as in this module it lists the Groups we can select as the recipient. Alongside the title it adds the note that it is a Group Set (i.e. container for a number of groups) or an individual group (which is part of the Group Set):

More advice on using Groups in Ultra here.
We have chosen All students in this example. As seen below, you have an option to send an email copy to recipients. This may be useful as an additional reminder, especially if the message is an important communication:

As with many Ultra functions you will see the text box appear where you can add your message. When complete click the Send button.
NB A recommendation (from Blackboard) is that although you may be able to add images etc. as content they advise that these items may not display correctly as they will be dependent on the student's particular hardware and software. This may differ to the sender's software etc.
Viewing and deleting a message
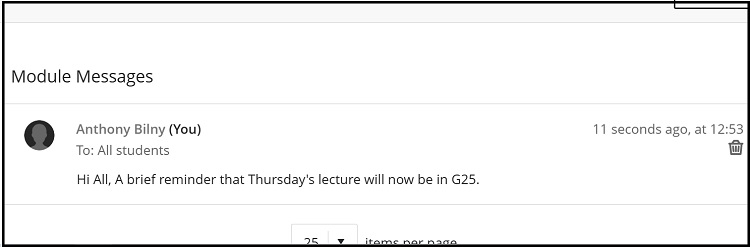
Below shows the message posted and as advised above the subject matter is visible as it is a brief message on a room change. You will also notice that the message can be deleted by clicking the bin icon to the right-hand side:
Although a student can't create or reply to a message they can delete it, but only from their own message tab menu as the original message will still be present on the sender's (i.e. member of staff Messages).
Grade Centre and messaging
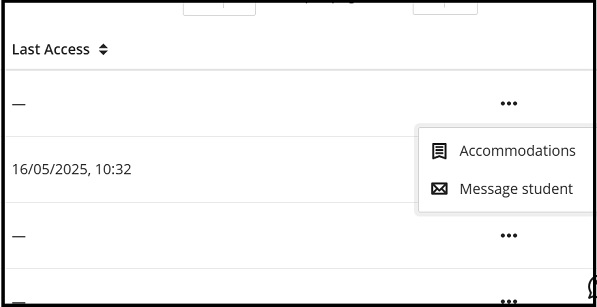
You can send messages to students in the Grade Centre by going to the Students tab selecting the student by clicking the three dots menu to the right of their name and Message Student - see second screen shot:

A new message box will appear with the student already selected and you proceed as before to send a message.
Sending Messages in Grade Centre - Submissions
Also in the Grade Centre, but in the Submissions tab, you will also be able to send a message. Select the Grade centre and Markable items. Then choose the assignment etc. link from under the Item column and then the Submissions tab:
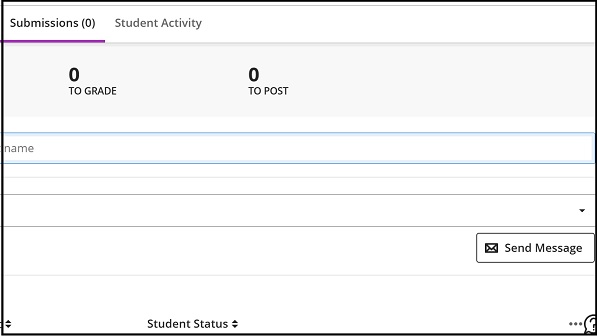
Click the Send Message button, but this time you will need to select the student or the group required.
Messages via MyBeckett main menu
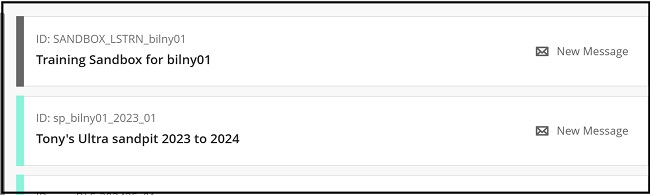
The Messages menu item on the homepage is where you can view all your modules (i.e. My Beckett Original also) and send messages from individual modules without going into them - Clicking on Messages below brings you to the second screen shot:

Selecting New Message opens the new message dialogue box as before.
Staff to staff messaging
Another feature available to staff only is that the Messages section on the institution page will alert you as a staff member to new messages sent from other staff members in a module. For example, a module leader may contact another instructor enrolled on the module using this method.
Below indicates a new message has been received:

Clicking this again shows a figure (in this case a circled 1) where the new message is located:

And in the Messages tab this new message is highlighted in the same way:

