Leeds Beckett University - City Campus,
Woodhouse Lane,
LS1 3HE
Create a Journal
Page last updated:
This guide provides information for staff about the journals tool in MyBeckett.
What is the journals tool?
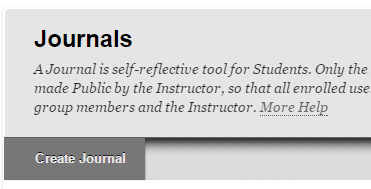
The journals tool provides an online space in which students can record and reflect upon their progress and achievements. This can also be useful as evidence for portfolio-based work within MyBeckett modules and or course groups.
- You can also choose to grade each Journal entry and provide feedback
- Grade journal participation for each student or sub-group
PebblePad is an alternative option to the journals tool. Please read our guide to find out more about PebblePad.
Before you start
Will your module contain more than one journal?
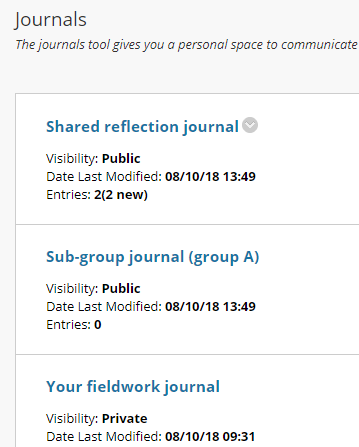
If your module will contain multiple journals, you may wish to display these to students on a journal page. This is useful as it provides additional information about visibility, date last modified and entries.
Will journal entries be private?
When setting up a journal, you can decide if entries will be private (visible to instructors and individual students) or available to all instructors and students enrolled on the module.
Please Note: If you change the journal settings to Public (Permit Module Users to View Journal) after any journal entries are posted when previously set to private (including the tutor posts), this will allow all previous posts to be visible to everyone on the module.
You can create a journal using the module management menu / control panel, and then decide where in your module you want to deploy this to students.
Alternatively, you can create a direct link to a journal within a module content area, as described in section 4 of this guide.
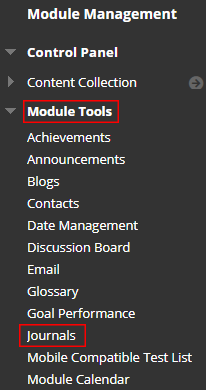
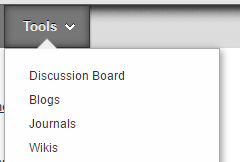
a. Expand the Module Tools section at the bottom left of the screen, then click Journals.
b. Click Create Journal.
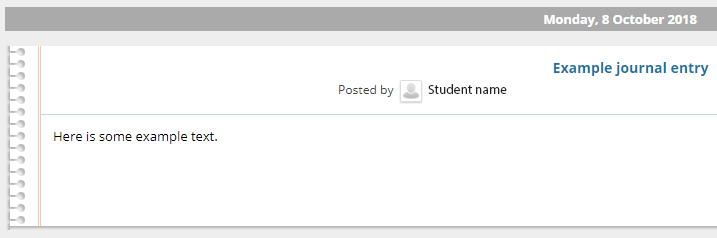
c. Type a Name and some Instructions. Make sure the name is descriptive, so that it is clear what the journal is about. We recommend that you include information about the module visibility so that students know if it is public or private.
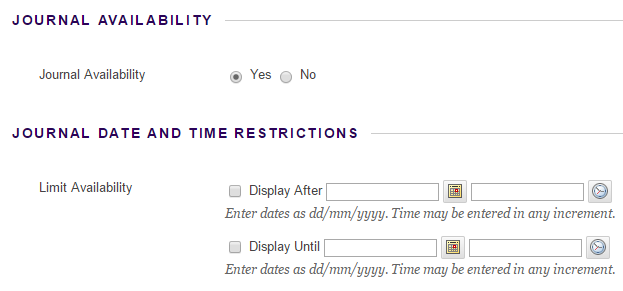
d. Set Journal Availability to Yes, and enter Date and Time Restrictions if required.

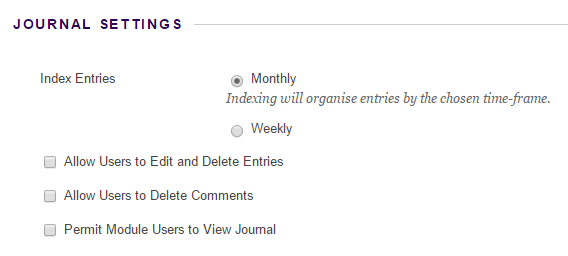
e. Apply Journal Settings. We recommend not allowing users to delete anything so that there's a record of all contributions.
- For a private journal, leave Permit Module Users to View Journal unticked. If you tick this box, the journal will be visible to all module users..
- Please note: Public journals means that the journal entries by students are visible to each other on the module rather than public outside of MyBeckett.
Example of Private settings:
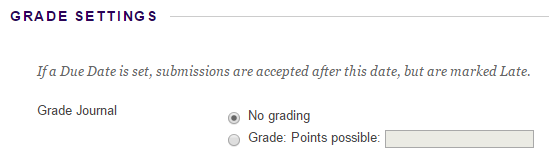
f. Apply Grade Settings to allow grading of contributions if the students' journal forms part of an assessment. If so, choose the points possible. It's best to mark out of 100 and weight assignments etc. later in the Grade Centre.

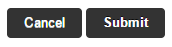
g. Click Submit. The journal is created.
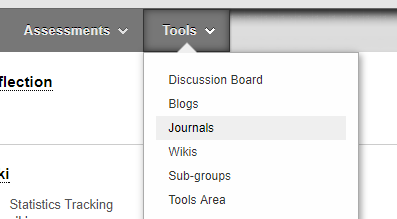
h. To add the journal to a content area, navigate back to the Module Content page you want the journal to display in, and hover your mouse over Tools and click Journals.
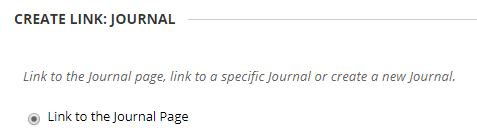
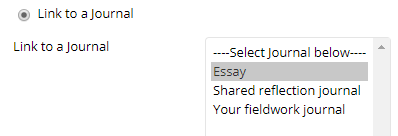
i. Select the Link to a Journal option and click on one in the list. Then click Next.

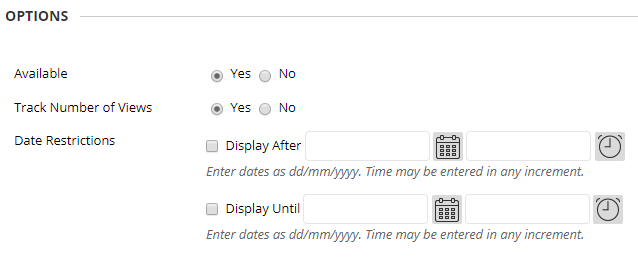
j. Type a Name for the link and a brief description, then set Availability to Yes if you want students to see it. You can also Track Number of Views and set Date Restrictions. When you're done, click Submit.
k. A link to the journal is created in the content area. Click it to view the journal.
If your module will contain multiple journals, you may wish to display these to students on a journal page. This is useful as it provides additional information about visibility, date last modified and entries.
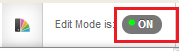
a. Turn edit mode on using the switch in the top right corner of the page.

b. In a content area, hover your mouse over Tools and click Journals.
c. Click Link to the Journal Page, then click Next.
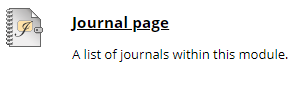
d. Type a name e.g. 'Journal page', and description such as 'a list of journals within this module'.
e. Set Availability to Yes if you want students to see it. You can Track Number of Views and set Date Restrictions. When you're done, click Submit.
f. A link to the journal page is created in the current content area.
NB: This link will be empty until you create at least one journal within your module.
You may wish to provide a direct link to a specific journal within a module content area. We recommend that you add information to the journal name and instructions, letting students know what the journal is for and who it is visible to.

a. Turn edit mode on using the switch at the top right corner of the page.
b. In a content area, hover your mouse over Tools and click Journals.

c. Click Create New Journal.

d. Type a Name and some Instructions. Make sure the name is descriptive so that it is clear what the journal is about. It is also a good idea to state if the journal is public (visible to everyone on the Module) or private.
e. Set Journal Availability to Yes, and enter Date and Time Restrictions if required.
f. Apply Journal Settings:
- We recommend not allowing users to edit/delete entries, so that there's a record of all contributions.
- For private Journals only - leave Permit Module Users to View Journal unticked.
- For all Journal entries to be visible to all module users - tick the Permit Module Users to View Journal box.

g. Apply Grade Settings to allow grading of contributions if the students' journal forms part of an assessment. If so, choose the points possible. It's best to mark out of 100 and weight assignments etc. later in the Grade Centre.
h. Click Submit. The journal is created.
i. Next, you're asked to Link to a Journal, select the one you just created and click Next.
j. Type a Name for the link and a brief description, then set Availability to Yes if you want students to see it immediately.
k. You can Track Number of Views and set Date Restrictions. When you're done, click Submit.
l. A link to the Journal is created in the current content area at the bottom of the page. Click it to view the journal, student preview shows it from the student perspective.
When you have set up a journal in your module, you may find it helpful to test this from a student perspective using Student Preview mode.
Student support for using MyBeckett is available via the Library. You may find it useful to provide a link to this student guide to using the journals tool in MyBeckett.
When creating a journal you can choose to add Marks and Rubrics to each journal entry. This will then create a column in Grade Centre.
To view the entries you can either:
- Grade Centre and click on the 'Needs Marking' link
- via the Journal topic page
Below is how to add grades, comments, feedback and attach a Blackboard rubric.
To assign a Mark/Grade
a. Via Grade Centre a new entry will be indicated by the yellow exclamation symbol. Or via the Journals page via Module Tools and click on a student's name that has a number in brackets next to it. Example: Joe Bloggs(1). (The number in brackets indicates a new entry).
b. Type a point total in the Mark field, or if you associated a rubric for this marked journal, expand and complete the rubric.
c. Alternatively, type Comments in the Feedback in the Marking Notes - Private, which appear to the Instructor only.
Marking with Blackboard Rubrics.
d. If set up with a Rubric associated, click the rubric title to open it.
e. Select each criterion to apply that point value to the mark.
f. Optionally, select the boxes to Show Descriptions for criteria and to Show Feedback text boxes.
g. A running total score will be displayed as point selections are made.
h. Either, type a score in the Change the number of points box to override the selected score, and/or give Feedback.
Here is a detailed guide of the grading Journal entries via the Grade Centre.
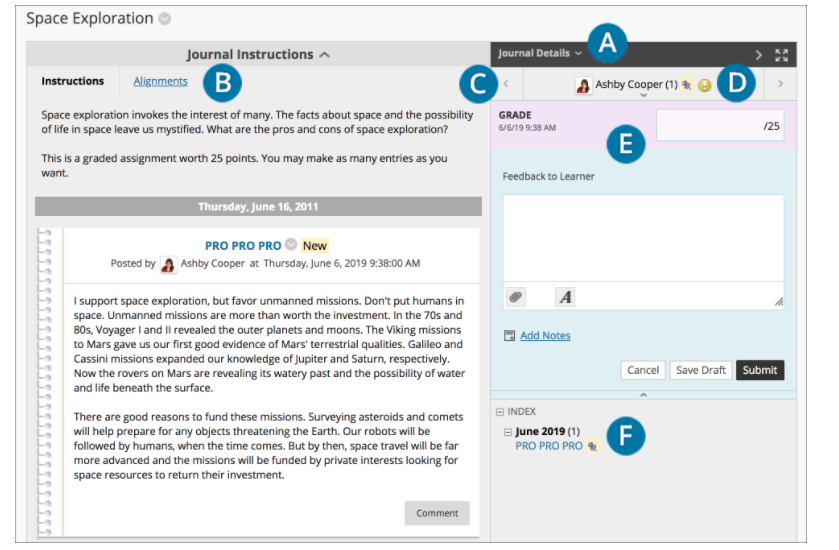
- (A) In the sidebar, you need to expand the Journal Details section to display information about the current selection, including the author and number of entries and comments. Select the right-pointing arrow to collapse the sidebar for more viewing room for entries. Select the four arrows to view the journal entries in full screen.
- (B) Journal Instructions are expanded by default. You can minimize them and also edit this area.
- (C) To view all entries, select the down-pointing arrow to view a list and select a member. The selected member’s entries appear in the content frame (to the left). Use the left / right-pointing arrows to navigate to the previous or next student. Select Show Empty Journals to see which students haven't contributed.
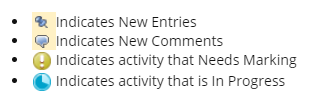
- (D) For Graded journals, icons designate the status of a user’s activity. The Needs Grading icon indicates that a user has met the minimum activity for grading you set for the journal. The In Progress icon appears when a user has some activity but hasn't yet met the minimum number required to trigger needs grading status.
- (E) In the Grading Sidebar, provide a grade and feedback for the student. In the Feedback to Learner box, select the editor icon represented by the letter A to open the pop-up editor window.
- (F) The Index displays the titles of the entries created by an author during the selected time period. Select the minus sign to collapse the title list.
Symbols meanings