
Leeds Beckett University - City Campus,
Woodhouse Lane,
LS1 3HE
Create a test
![]()
Page last updated:
This staff guide will show you how to create a test in your Ultra module.
You can create an online test in MyBeckett to check student knowledge and give immediate feedback.
If you are not teaching on a Ultra module please refer to our alternative create a Blackboard test guide.
You can also copy Blackboard tests and Question Banks.
The first step is to decide where you want to create your test within your module. This could be on the Module Content page or within a learning module or folder.
a. Click the plus icon where you want to add a test.
b. Click Create to open the Create Item panel.
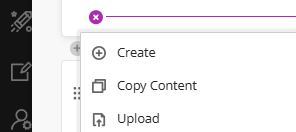
c. Click Test (this is in the Assessment section of the side panel that opens).

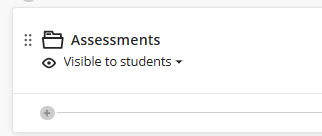
d. The New Test page opens. You can change three things on this page:
- The test name
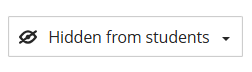
- Whether the test is visible to students (it is hidden by default)
- Test settings
e. To change the test name, at the top left, click New Test DD/MM/YYYY to type a name for the test.

f. Whilst building the test we recommend that you leave it hidden from students (this setting is at the top right).
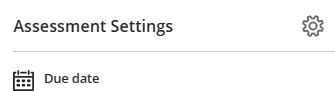
g. You can control test settings in the Assessment Settings panel on the right. Click the cog icon to open the full list of options. We will cover these in more detail in the following sections of this guide.
You can create questions within your test, or you may wish to create a pool of questions that you can reuse.
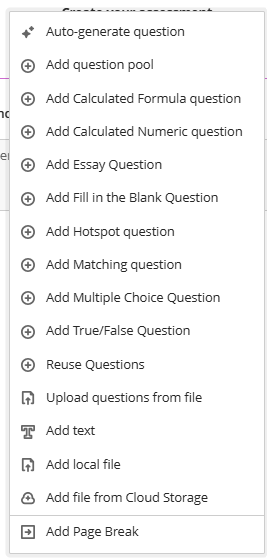
a. To add questions to your test, click the plus icon that appears on the test page.
b. Select the question type that you want to create, such as:
- Add a question pool
- Add Essay question
- Add Multiple Choice Question
- ...and many more question types.
c. Complete the required elements for the question that you have chosen, such as title, question text, answer options.
d. Repeat until you have finished adding questions to your test.
e. You can also add elements such as files, text and page breaks to the test. These options are available to select within the list of question types.
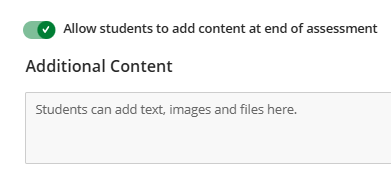
f. After you have added at least one question to the test, you can choose if you want students to add additional content such as text, images and supporting files at the end of the test. Switch this option off if you don't want students to use it.
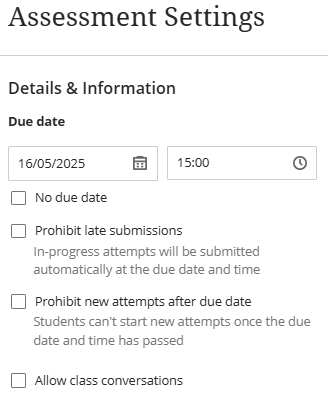
In the Details & Information section, you can decide if you want to add a due date for your test.
a. If you want a due date, use the date and time picker to specify what this should be.
b. If you do not want a due date, tick No due date.
c. The Prohibit late submissions option means that any in-progress attempts will be cut off and submitted automatically at the due date.
d. The Prohibit new attempts after due date option means that students cannot start a new test attempt after the due date and time has passed.
e. The Allow class conversations option means that students can discuss the test with instructors and other students on the module when the test is available. This may be useful for informal quizzes.
Under Presentation Options, you have some choices about how test questions display to students. If some of the options are greyed out, it may be that they are not relevant to the content of your test e.g. randomise pages will be greyed out if you have not used page breaks.
a. Display one question at a time means that each question is displayed on a new page.
b. Prohibit backtracking means that students cannot go back to a previous question.
c. Randomise questions means that questions will display in a different order for individual students. To avoid confusion, don't type question numbers into your question text if using this option or they will become jumbled out of sequence.
d. Randomise answers means that questions with multiple answer options (e.g. MCQs and matching questions) will display the answers in a different order for individual students. Avoid this option if your MCQs include an answer choice which states 'All of the above' as randomised answers may cause confusion in this case.
e. Randomise pages only applies if you have used page breaks within your test and means that pages will display in a different order for individual students. You can tick a box to prevent the first page from being randomised, which is useful if it contains instructions that should be read at the start of the test.

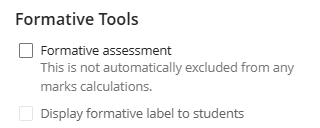
Under Formative Tools, you can specify if a test is a formative assessment and if you want to display a formative label to students.
Useful to know:
- When you create a test, a Grade Centre item for the test is created automatically.
- You can build marks and feedback for correct/incorrect responses into most question types.
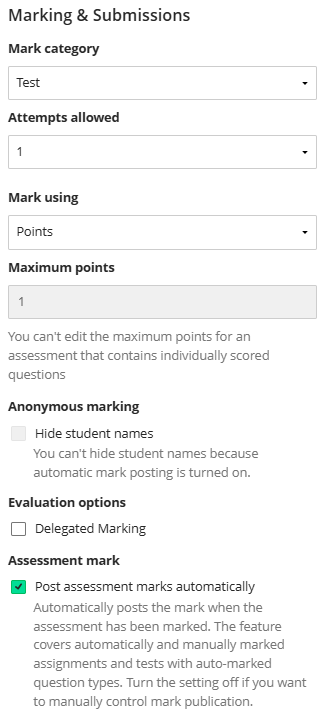
Under Marking & Submissions, you can:
a. Change the Mark Category if you want the test to be categorised in a different way in Grade Centre.
b. Attempts Allowed: Specify how many attempts you want to allow for students (you can select a number or unlimited attempts).
c. Decide how you want to mark the test. The default Mark using setting is Points. Other options include Percentage, Complete/Incomplete and Letter.
d. The Anonymous marking option may be greyed out depending on other test settings.
e. If you want to assign markers to individual submissions, you can use Delegated Marking.
f. Under Assessment mark, you can decide whether you want to share marks with students automatically. Turn this setting off if you control the release of marks manually.
In the test settings, the Assessment Results section enables you to control how students access feedback, marks and test answers. You will need to decide when you want to share results with students and what you would like them to see.
Submission View
If switched on, this setting allows students to view their submission at the time that you specify. Options include:
- After submission
- After individual mark has been posted
- After due date (if you have used a due date)
- After all marks have been posted
- On specific date
- One time
If switched off, students only see the test questions whilst they are taking the test. They cannot reopen their submission again at a later date.

Automated question feedback
If switched on, students will receive any automated feedback that you have built into test questions at the point in time that you choose. Options include:
- After submission
- After due date (if you have used a due date)
- After all marks have been posted
- On specific date

Question scores
If switched on, students will be provided with the individual scores for each question in their test at the point in time that you choose. Options include:
- After individual mark has been posted
- After due date (if you have used a due date)
- After all marks have been posted
- On specific date

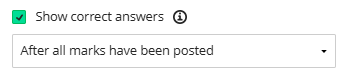
Correct answers
This setting is dependent on Show question scores being switched on.
If switched on, students will see the correct answers to automatically scored questions at the point in time that you choose. Options include:
- After individual mark has been posted
- After due date (if you have used a due date)
- After all marks have been posted
- On specific date
In the test settings, the Assessment Security section enables you to add an access code to your test, if you wish.
Access codes are generated randomly by the system and need to be distributed by an instructor at the start of a test.

Towards the bottom of the test settings panel, there are some options listed as Additional Tools.
Test time limit
a. If you want to set a duration for test, click Add time limit.

b. You will be prompted to enter the number of minutes for your test.

c. You can also set submission rules to determine what you want to happen when the time limit expires. The options are:
- Work is automatically saved and submitted when the time expires.
- Or, students have extra time to work after the time limit expires.

What about extra time?
Extra time is controlled by accommodations.
Accommodations are set at module level for individual students. Accommodations include:
- Exemptions from due dates / time limits
- Exceptions on specific tests or assignments, such as additional attempts or extended access.
If you have set up accommodations for any students on your module, this number of students will appear in the Test Settings panel.
Goals & standards
Do not worry about the Goals & standards options, they are not currently in use within the system.
Assigned groups
You can create a test for groups of students. This option will not be available if you have set a time limit for the test.
By default, you mark each group as a whole but you will have the option to change a group member's individual mark.
Useful to know:
- When you create a new test, it is hidden from students until an instructor chooses to show it.
- You can use Release Conditions to control when students can access a test, based on rules that you apply.
- Students only need to meet the conditions of one rule for the test to be visible for them.
Change the visibility of a test:
At the top right of the test page, you can use the visibility options dropdown menu to choose whether the test is visible to students, hidden from students, or whether you want to set release conditions to control the visibility of the test.

To set release conditions based on a date/time:
a. Click the Release conditions option from the drop-down list.
b. Choose if the rule applies to All members or Specific members/groups.
c. Tick Date/time then use the date and time pickers to specify the Access from / Access until date/time as appropriate to your test.

To set release conditions based on performance:
a. Click the Release conditions option from the drop-down list.
b. Choose if the rule applies to All members or Specific members/groups.
c. Tick Performance then use the menus to specify the markable item that is a prerequisite of the test. For example, an assignment that students must submit before they can start the test.

If your test has a time limit (a test setting within the Additional Tools options), this will apply to all students unless you set Accommodations for individuals that give them extra time.
Accommodations are set at module level by an instructor for individual students. Accommodations include:
- Exemptions from due dates / time limits
- Exceptions on specific tests or assignments, such as additional attempts or extended access.
How to manage Accommodations
a. If you have set up accommodations for any students on your module, this number of students will appear in the Test Settings panel, under Accommodations.

b. You can click on the number of students to view a list of names and associated accommodations within the module. To view more details or manage accommodations, click the View Class Register button at the bottom of the panel.

c. On the Class Register page, students that have accommodations within the module are flagged with a purple symbol next to their name (in instructor view).
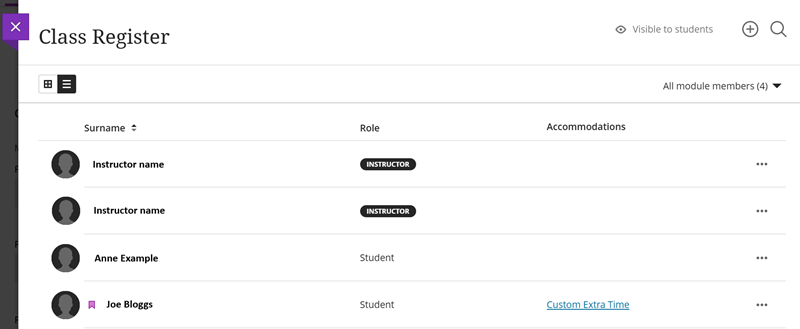
d. To add or edit accommodations, click the three dots to the right of the student.
e. Click Accommodations.

f. You can then select the accommodations that are approved for the individual student. For extra time, tick Time limit accommodation then set the percentage of extra time allowed. Click Save.

Useful to know:
- You can use the Student Preview tool to check what the student experience of a test will look like.
- If you cannot use Student Preview because the test is hidden from students, we have outlined the student experience below.
How do students start a test?
When students click on the test link, a panel will open on the right of the page. This shows the test details such as due date, time limit, number of attempts, and marking details. If your test does not have a due date or time limit, the panel will state this.
To begin, students must click Start Attempt at the bottom of the panel.
If your test has a time limit, a pop-up will appear which confirms the duration of the test (adjusted for extra time accommodations if relevant). Students must click the Start Timer button to launch the test.

What does the test page look like for students?
The test is set out with questions and answer options on the left and test details on the right.
If your test includes multiple pages, navigation arrows will appear at the bottom.
On each page, a Save and Close button and a Submit button appear at the bottom right.

How do students submit their answers?
To finish the test and submit their answers, students must click Submit at the bottom right of the page.
When a student clicks Submit, they will be prompted to confirm by pressing Submit again.

Useful to know:
- When a test is visible to students, they receive an automated notification in their MyBeckett Activity Stream.
- If marks / feedback have been released for a test, students will also be able to access these via their Activity Stream.
- As an instructor, you will also receive a notification in your MyBeckett Activity Stream when test submissions are ready for you to mark.
