Leeds Beckett University - City Campus,
Woodhouse Lane,
LS1 3HE
Creating DISCUSSIONS | ULTRA
![]()
Creating Discussions in Ultra
This staff guide provides instructions on how to use the discussion boards function in your MyBeckett Ultra module/community.
They can be a useful function in student group work or for the module in general.
Discussions can also be created and marked as another form of assessment or assignment.
You can create discussion in two ways, via the Discussion tab or anywhere in the course content page by creating a new content item.
- Use folders to separate topics / forums.
- Auto-generative text (Optional)
- Review extra Discussion settings
- Marking and Participation
- Monitoring Student Activity and sending a message for non-participants
Create a Discussions via the tab
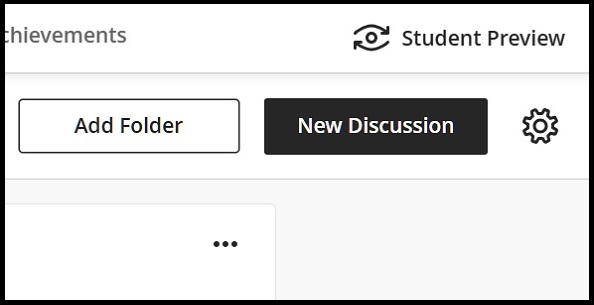
a. Click on the Discussions tab at the top of the module/community page
b. Then choose between starting a ‘New discussion’ or ‘Add Folder’:

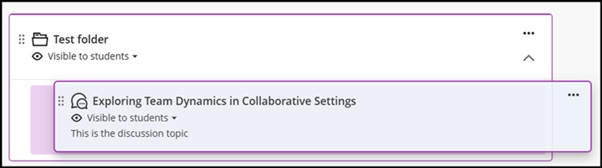
c. If you have a lot of discussions, you may wish to use folders to indicate different forums or topics.
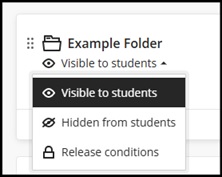
d. Make visible to students.
Organise Discussion Forums / Threads by creating folders
a. Use the Add Folder option, give it a meaningful name, description and click Save.
Note: You can create new discussions directly within the folder or drag previously created discussions to the folder.
b. To drag a previous discussion into a folder using drag and drop.
Create Discussions in a Content Area
a. Click plus icon to view the options for creating content
b. Select ‘Create’ and the create item panel will open on the right-hand side.
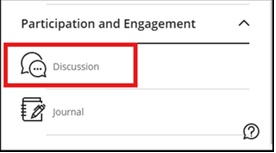
c. Scroll down to discussion in the Participation and Engagement section:
d. Add a name to your discussion by clicking in the box. Ensure the title is meaningful to help your students find the right discussion:

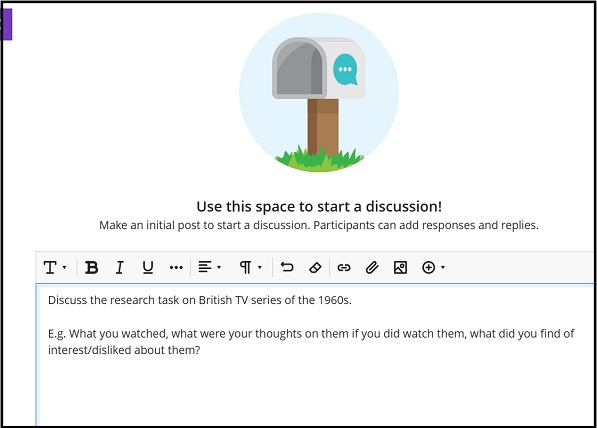
e. You can then make an initial post by typing in the box and formatting as required. Then click ‘Save’:
f. Make visible to Students (all new discussions are hidden by default).
g. Check all Folders are visible to students too.
Editing your discussion and make it available
a. Rename your discussion by clicking the pencil icon as before and overwriting the automated title etc.
b. You can then make an initial post or discussion question by typing in the box and formatting as required. Students or other instructors can add replies.
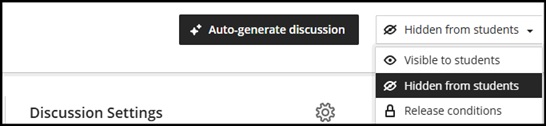
c. New discussions are hidden by default. Ensure your discussion is visible to students by selecting the drop-down arrow under the title of the discussion or on the top right if you are within the discussion board area:
Replying to a discussion
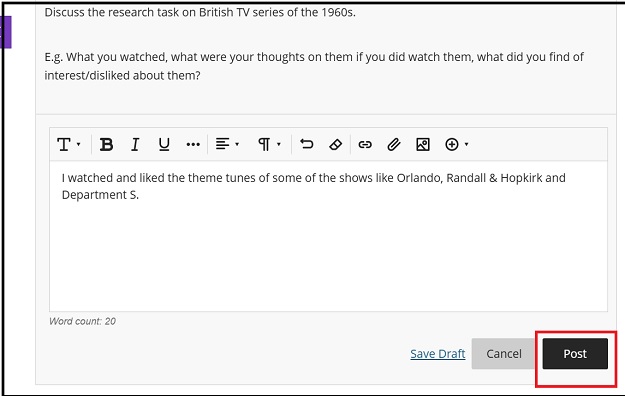
a. To reply to a discussion thread (topic) click in the Post a response to the discussion box and then click Post:

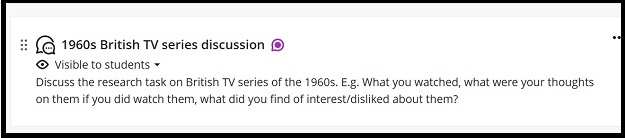
b. The discussion thread will show there is a new reply by a purple thought balloon icon next to its title:
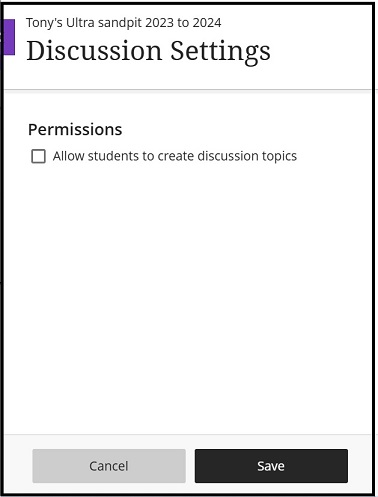
Allowing students to create discussions
a. Click the cog icon located at the top right-hand side of the Discussions tab:
b. Select the box to allow students to create discussion topics and then Save.
Use Auto-generate discussion to create a discussion (optional)

a. Click the ‘Auto-generate discussion’ button and the discussion will automatically be created based on the module title and description on the right-hand side of the page.
b. If you would like the discussion to be about a specific content item, you can click Select module items to pick a certain folder or content item and click Select items:

c. Enter a description (limit is 2000 characters)
d. Select the desired cognitive and complexity level. The cognitive levels are based on Bloom’s Taxonomy.
e. Select whether you would like to generate a title for the discussion
f. Once finalised click Generate.
g. Choose the discussion you would like to add to your module and then select Add.
h. You can then amend the title and initial post, if necessary, before pressing Save.
i. New discussions are hidden by default. Ensure your discussion is visible to students by selecting the drop-down arrow under the title of the discussion or on the top right if you are within the discussion board area.
Review Discussion settings
When creating a new discussion by any of the methods shown review the Discussion settings to tailor the discussion as you wish.
a. Click the cog icon located at the top right-hand side when you have selected the created discussion.
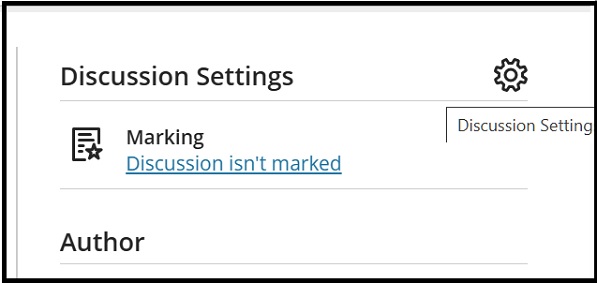
b. Please note that clicking the Discussion isn't marked link also takes you into the settings dialogue box. The first half is displayed in the below screen shot -review these options.
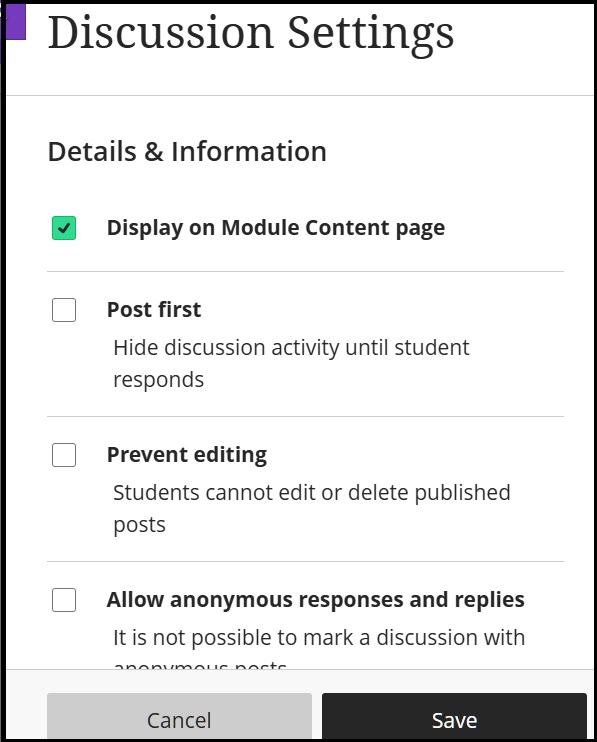
c. The second half of the settings box as you scroll down, displays the option where you can mark the discussion (i.e. create one as an assessment):
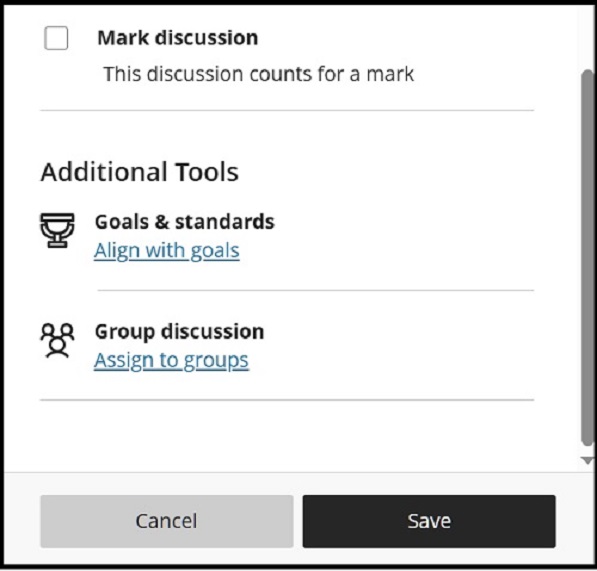
d. You can also assign it to student groups - please see the guide to Groups in Ultra.
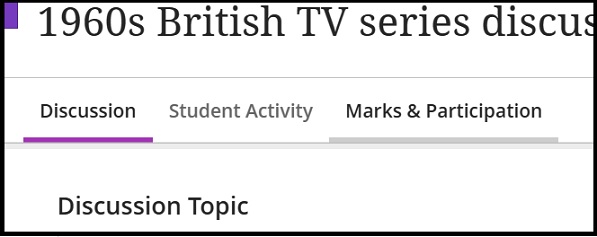
Marks and Participation
a. If you do choose to mark the discussion and you will see a new tab appear in the discussion, Marks & Participation:
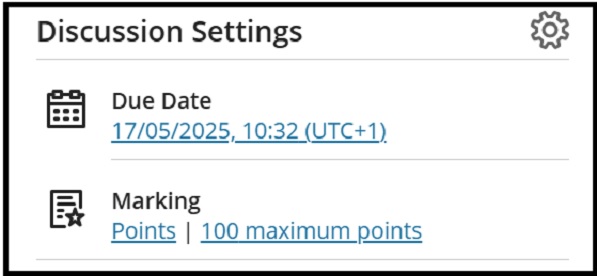
b. Also the Due Date and Marking scheme is added to the right-hand side:
c. Please note that whilst in the Marks & Participation section, you will be able to mark the discussion but it will also appear in the module's Grade Centre.
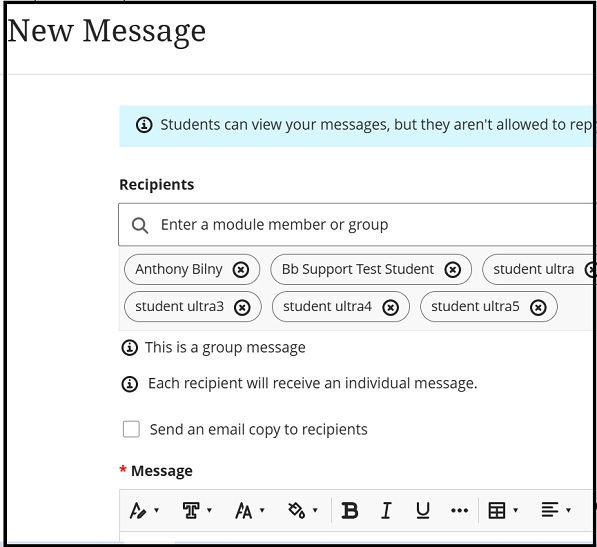
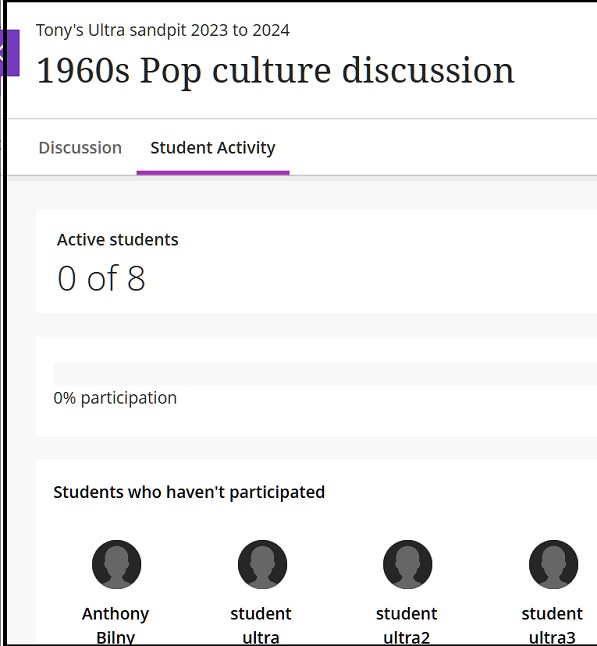
Student Activity
You will also have noticed in the above the Student Activity tab which shows who hasn't contributed to the particular discussion. It also has the feature to message the student(s) this appearing on the right-hand side by the envelope icon - see the second screen shot:
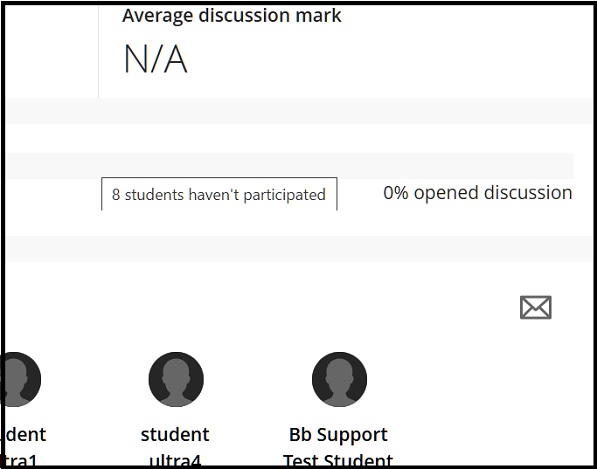
When clicking the envelope icon you will see the message box which by default has selected to message all the module students: