
Leeds Beckett University - City Campus,
Woodhouse Lane,
LS1 3HE
Create and manage achievements
Page last updated:
You can use the achievements tool to reward and motivate your students, or to create a map of what they can learn in your module.
You can award a student an achievement for a piece of work. Basically, it’s a shiny merit badge.
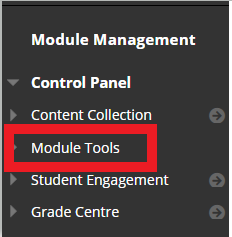
a. In the Control Panel, click Module Tools, then click Achievements
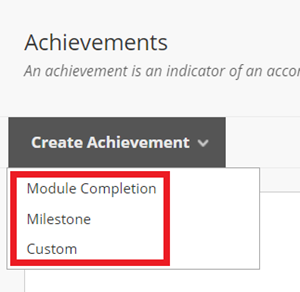
b. Hover your mouse over Create Achievement and click either:
• Course Completion: A certificate reward is required. An additional badge is optional.
• Milestone: The reward can only be a badge.
• Custom: The reward can be a badge, certificate or both.
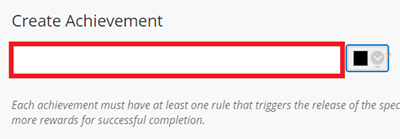
c. Type a name for the achievement:
d. In Achievement Location, click Browse. Choose a module location in which students will earn the badge or certificate. When they get an achievement, students are notified of its location.

e. You can make the achievement Visible to students before receiving. This means they'll be aware of it before they earn it. Click Yes or No.
Yes: Ideal if you want to reward all students.
No: A special reward for specific students.

f. Optionally, you can type a Description. Ideally it should outline what you expect students to do in order to achieve the reward.
g. Now click on Define Triggers and follow step 2 of this guide.
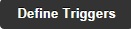
For the achievement to be awarded to the student, you must define at least one trigger rule, although you can have more.
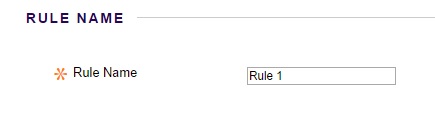
a. On the Define Triggers page, type a Rule Name.
b. You can set a Display After date. Students won’t get the reward until after this date, even if they've already met the criteria. If no date is set, the achievement is available immediately to students who meet the criteria.
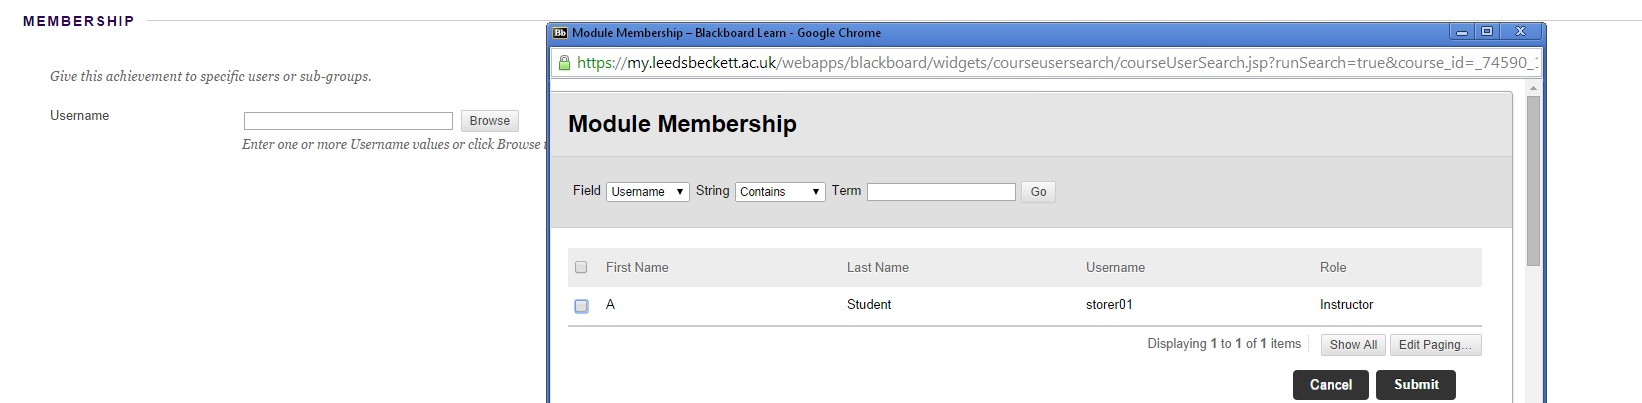
c. Define Membership to award the achievement to specific users or Sub-groups.
To award it to a specific User, click Browse, then click the Field drop-down and choose between Username, First Name or Last Name. Type a name / username and click Go. When the user is displayed, click the tick box next to their name, then click Submit.
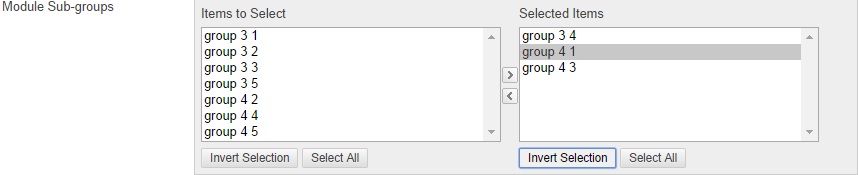
To award it to a specific Sub-group, click the group in the Items to Select list. Then click the right arrow to move the group into Selected Items. If you add the wrong group, you can select it and move it back using the left arrow.
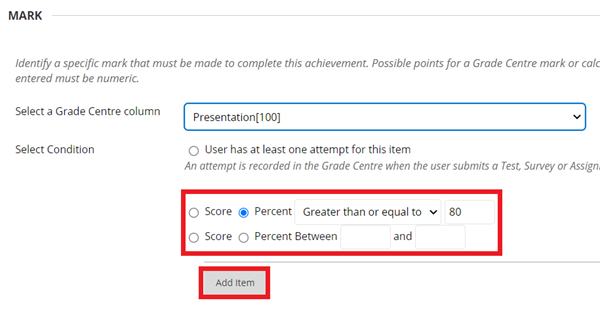
d. To award an achievement based on a specific Mark in an assignment or test, select a Grade Centre column.

e. Click the button next to Score or Percent and change the drop-down to Greater than or equal to, specifying a number in the box.
For example, if you had a Week 1 Quiz and you were awarding an achievement for a minimum of 18/20. You set the Grade Centre column to ‘Week 1 Quiz’ and choose a Score of Greater than or equal to '18'.
Click Add Item.
f. The Review Status section allows you to force users to review specific content to get the achievement.
This tends not to be effective, as a student doesn't actually need to have read whatever it is you want them to read. All they have to do is click a box which gives the impression that they've read it.
Important: We recommend you don't use Review Status.
g. If you want to award an achievement based on students meeting two separate criteria, click Add Another Rule. (Top of the page.)
h. Click Select Reward.
You can choose the type of reward students get.
a. Under Reward Details, choose an Issuer Name. This might be your name, or the Course / School / University name.
You can define an Expiration Date for the achievement, but we don't recommend it. Student NSS feedback shows that they like to have access to everything for the duration of their course.
b. Choose Reward Options. Availability of these depends on the type of achievement you chose at the start of this process.
- If you see the Certificate option, click one to select it. Click Preview Certificate to preview it.
- If you see the Badge option, click a Badge Image or click Browse My Computer to upload a custom image. Find your image file and click Open, then click Upload Badge.
- Finally, click the image you uploaded to select it. Uploaded images are automatically resized.
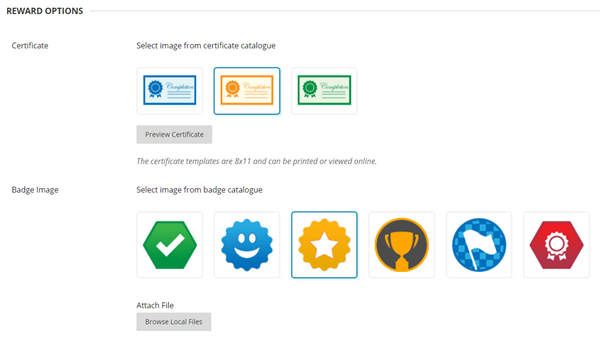
c. Click Save and Exit.

a. In the module Control Panel, click Module Tools, then click Achievements.
b. Hover your mouse over an achievement and click the action link (down arrow) that appears.
c. Click Delete.
Important: If you delete an achievement that a student has already earned, the reward will also be deleted.
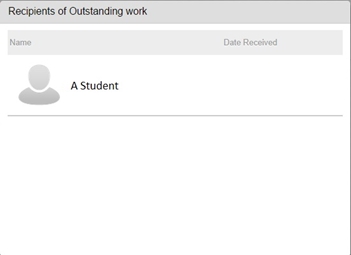
a. Go to Module Tools and Achievements: you can see all of the achievements awarded in your module and how many students have received an award. Click on the link to see them.

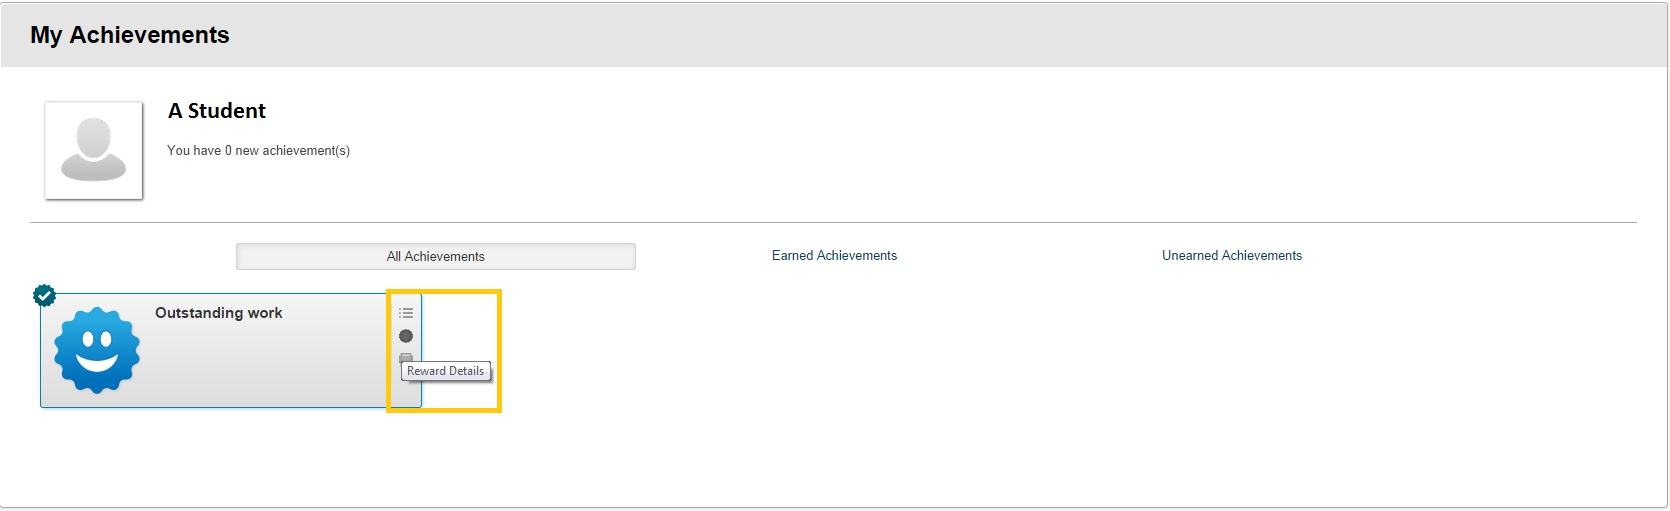
c. Click on a student’s name for that student’s view of the 'My Achievements' page.
c. Select one of three icons to view Requirements, Reward Details or Print Certificate.
Place a tool link in the navigation menu. Name it ‘Achievements’ and choose the Achievements tool from the drop down list. Tick the box to make it Available to students.
As long as the relevant Content and Adaptive Release rules are ticked in the copy process, achievements will be imported into new modules correctly.
Important: If the Achievement is based on Grade Centre scores and you want to copy it to another module, please contact the Digital Learning Service for further advice.
