
Leeds Beckett University - City Campus,
Woodhouse Lane,
LS1 3HE
MS Teams - start and join a meeting
This is a staff guide to setting up an online meeting directly via MS Teams.
This is useful if your attendees are not all enrolled on the same module or external contacts. You will also have the option to copy the URL link to the meeting to send an invite too.
You can also set up a MS Teams meeting from a MyBeckett module. We recommend this approach if you are going to run a MS Teams meeting for students who are all enrolled on the same module.
Please note, you do not need a MS Teams site setting up in order to use this meeting tool.
Attendees do not need to download the app, they will have the option to join via the Web view, although their tools with in the meeting will be limited.
a. Go to http://www.office.com and log in with your Leeds Beckett University account.
b. Click the Teams icon.

c. Click Calendar.

d. Click New meeting.

e. Set up your meeting options:
- Title: Type the name of your meeting
- Add attendees: You need to invite at least one person e.g. another instructor (you don't need to add your students at this point, you can share the meeting link with them via MyBeckett when you have set it up). Add external contacts, students for 121 meetings this will generate an email to the attendees.
- Date and time: Add the start and end date/time of your meeting.
- Recurrence: Optional. You can set up a weekly meeting, for example.
- Channel: Leave blank. This is only relevant if you have MS Teams sites set up.
- Location: Leave blank. This will auto-populate when you save.
- Details: This is where the meeting link will appear when you save.
f. Click Send.
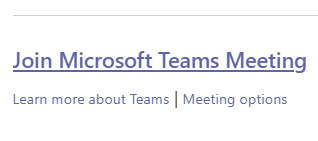
g. Your meeting will be added to the calendar. Double-click to open it. It will contain a Join Microsoft Teams Meeting link.
h. Select and copy the Join Microsoft Teams Meeting link to share via MyBeckett. You could add this to a content item (e.g. Web Link or Item), just make sure it's somewhere that your students can easily find it on the day.
i. Paste the joining information into MyBeckett. Make sure to let people know the date and time of your session (TIP: place the details in the meeting name), as they will need to click the joining link on the day. (For student support please refer any issues they may have joining to the Library IT Help Desk
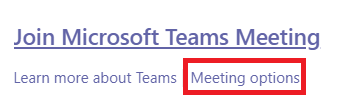
j. As the meeting organiser, you can click the Meeting Options link to change a couple of default settings if you wish and make changes or add people.
k. There are two settings in meeting options.
- Who can bypass the lobby: This controls who can access your meeting directly by clicking the link you have shared, and who needs to wait to be admitted.
- Who can present: This controls the meeting role that is assigned when people join your meeting. If you would like to restrict who can present, you can change this setting.
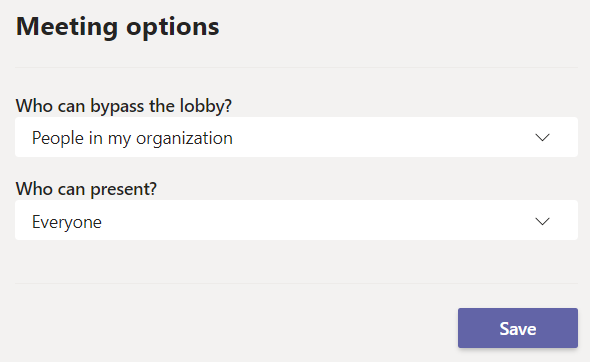
l. Click Save.
a. You can join the meeting at the time or beforehand by clicking the Join meeting link that you pasted into MyBeckett or received in your Outlook calendar invitation. Any attendees before the time will be set to wait in the Lobby and you can choose if you would like to admit them.
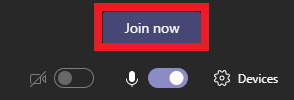
b. Make sure your microphone is enabled. You can also enable your video if you have a web cam.
c. Click Join now.
There are two ways to add people: While you are in a meeting (Meet Now) or at the point of setting up the meeting 'add attendees' which also allows you to add externals to join and sends an email with meeting link too.
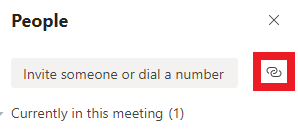
a. In your online meeting, click the people icon to show participants.

b. A panel will open on the right.
c. You can invite additional people by adding their email address, or click the link icon to copy joining information to share via MyBeckett/email/Skype.
a. Click the Hang up button when you are ready to leave the meeting.

Start a meeting as normal, the meeting organiser will now have access to the breakout rooms button on the meeting control bar.
Please Note: Difference of the breakout room icon on Windows/Mac
![]()
How do I make sure I can start using breakout rooms?
-
Make sure that the new meeting experience is enabled go to Teams -> Settings -> General -> Check “Turn on new meeting experience” (ITS can support you with this task)
-
Check and make sure you have the latest Teams updates (Update Microsoft Teams - Office Support)

a. Create Breakout rooms
Select Breakout rooms icon and choose how many rooms you would like. Select whether to automatically or manually assign your participants then select Create Rooms. To give each room a name, select the 3 dots ... next to each room, and select Rename room.
b. Assign Participants manually
Expand the list under assign participants then select participants by ticking the checkbox on each name (hover your mouse over each name). Select the 3 dots ... and choose a room from the list. Repeat until all participants are assigned.
c. Start breakout rooms
Select the 3 dots next to a room name, then Open room or select Open rooms to open all rooms at once Each room will change from closed to open status.
d. Breakout rooms in progress
To Join a breakout room, select the 3 dots next to the room, then Join. To return to the main meeting select 'Return'.
e. Send an announcement - to all breakout rooms
Select the 3 dots at the top of the breakout rooms menu, then Make an announcement.
f. Closing breakout rooms
To close a breakout room, select the 3 dots next to its' name, then Close room.
To close all rooms at once, select Close rooms.
g. Further information...
- You can have a maximum of 50 breakout rooms.
- Within breakout rooms, every participant can share content.
- Separate meeting chats are kept for each breakout room.
- The meeting organiser can interact with all chats.
- If a breakout room participant wants to get the attention of the meeting organiser, they can tag them in the chat using an @mention.
- If any recordings are made they will only be available to participants of the breakout room where they were recorded.
- Microsoft have promised that in future it will be possible to set more than one meeting organiser, to allow for greater control.
- Meeting organisers use the desktop client version of Teams, whereas participants can use either the desktop or mobile client, or even the web browser version.
h. Minimum Version Info...
- Minimum desktop app version: 1.3.00.24755 (released Sep 20)
- Minimum iOS build: 1.0.77.2020100603
- Minimum Android build: 1.0.0.2020091301
