Leeds Beckett University - City Campus,
Woodhouse Lane,
LS1 3HE
CREATING GROUPS | ULTRA

Creating groups in Ultra
This staff guide will show you how to set up and use groups within an Ultra module.
Please note: The first step in the creation of groups in Ultra is to create a Group set which is the container for a set of groups within it.
You can create groups of students in Ultra modules (or Ultra communities) such as seminar groups or where students can work together on projects and group assignments. Below briefly summarises the types of group sets that can be created to suit the need.
Manually assigned groups
An example of a Manually assigned group could be a seminar group set based on pre-existing seminar groups. You can choose to add students manually.
Automatically assigned groups
This will randomly place students into a number of groups, you allocate how many groups will be created and the number of students in each.
Self enrol groups
This option will allow students to decide themselves which group they will sign up for; an email invitation is sent to students for them to sign up to a group (similar to sign up sheets) and once created an alert will appear when the student accesses the module.
Import from CSV
This option allows you to import groups and their members which have been saved as CSV files (e.g. in Excel). Relevant to the above manually assigned groups above.
Other resources
Student FAQ: How do I use MyBeckett Groups in an Ultra module?
Creating a group set
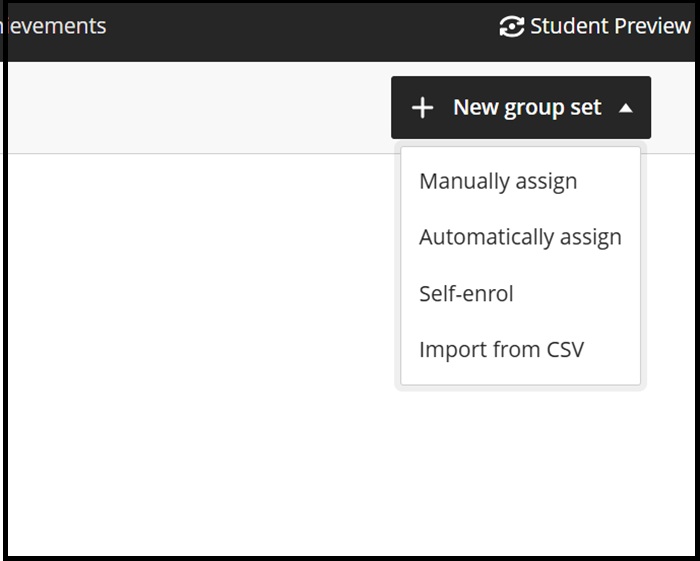
a. Click on the Groups tab and then New Group Set, Manually assign:
b. On the left-hand side of the screen you will see the new group set which you can rename (e.g. Seminar groups) and a list of the unassigned students greyed out (see below when this changes).
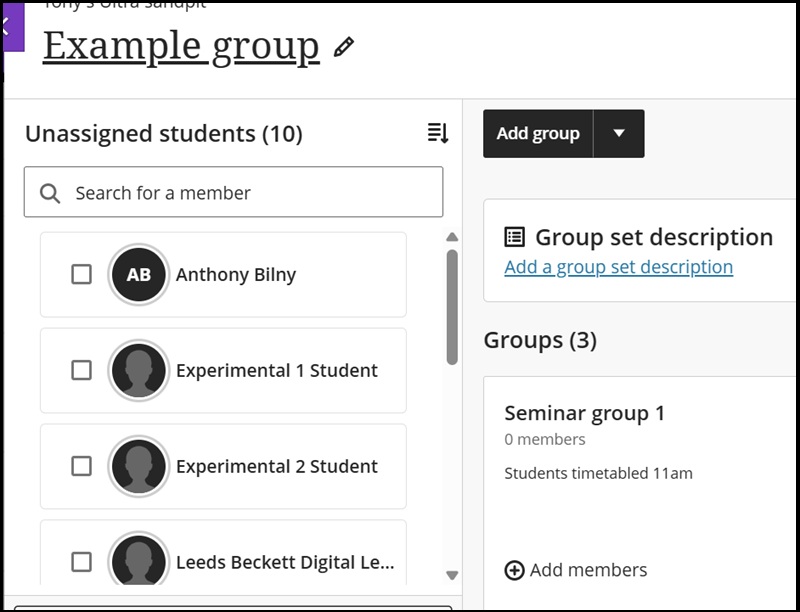
The Add group pull down menu allows you to create a single group or multiple groups (which would suit a seminar group set):
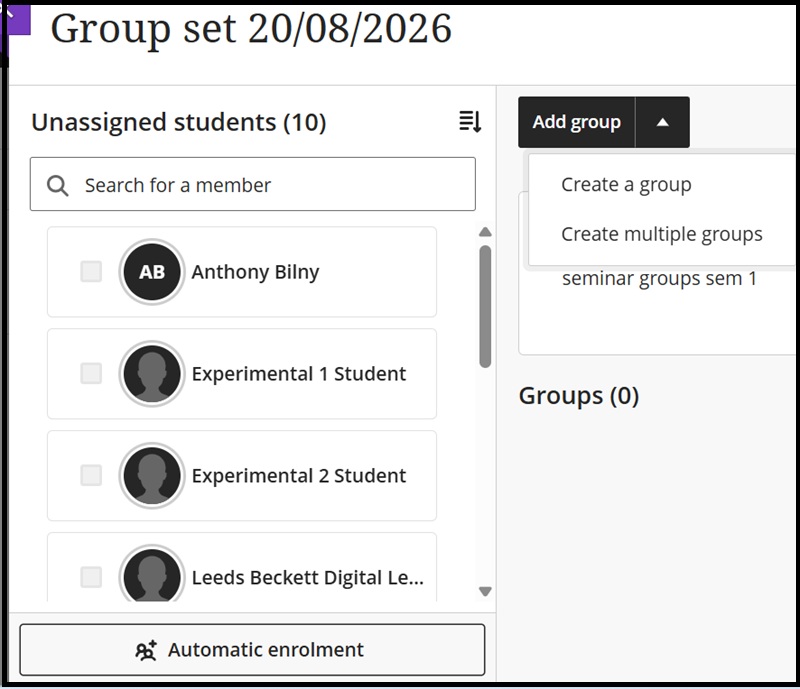
You will also note that within this option is for the random assignment of students in Automatic enrolment detailed in the next section.
c. Then on the right-hand side of the screen click the pencil icon to reveal the Group Settings menu (next screen shot also):
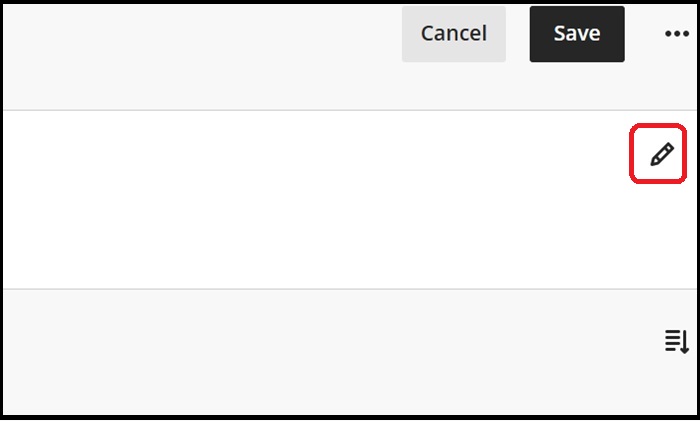
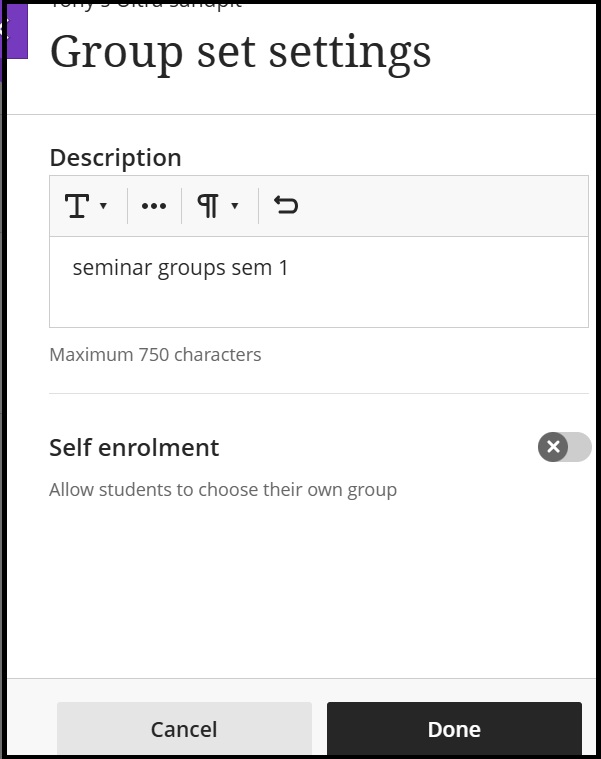
In the description box we have entered the term for what this group set will collect - e.g. a set for seminar groups in Semester 1.
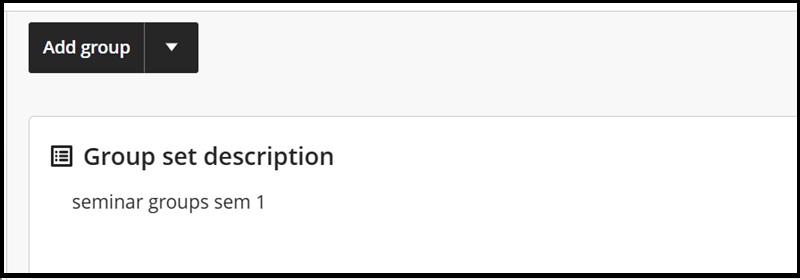
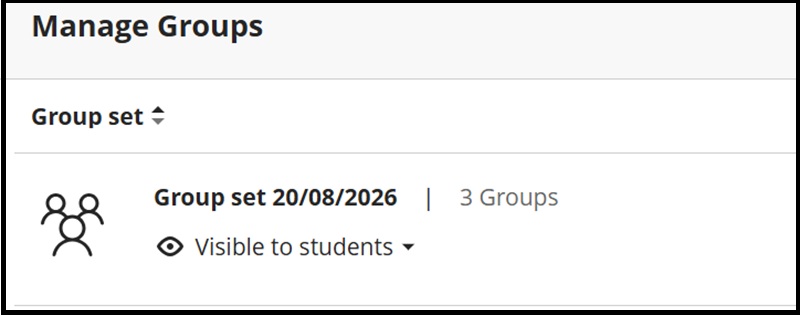
And on clicking Done it is entered as below. This will not rename the group set as you will need to do this as per usual for Ultra content items by clicking the small pencil icon next to the content item title (this example keeps the default Group set title 'Group set 20/08/2026').
Add groups to a group set
d. As in the second screen shot above to add groups to your new group set click Add groups and add one or as below multiple groups to it:
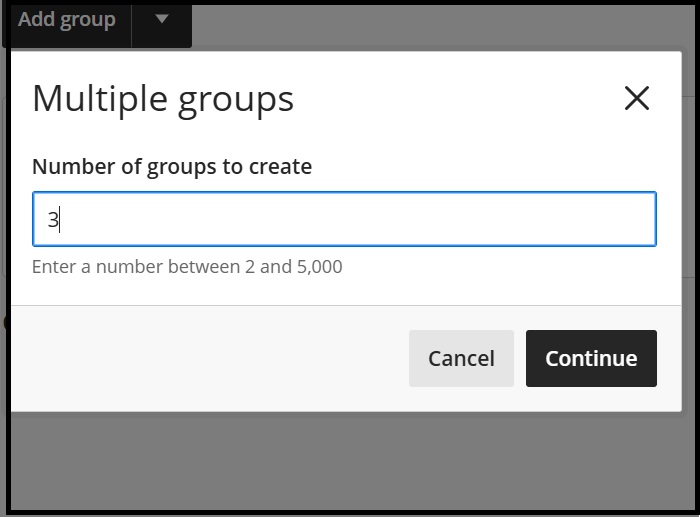
We have chosen to add 3 groups here and then clicked Continue which brings us to the next screenshot where the three groups are now listed. As mentioned above, the unassigned student list is now available to select from:
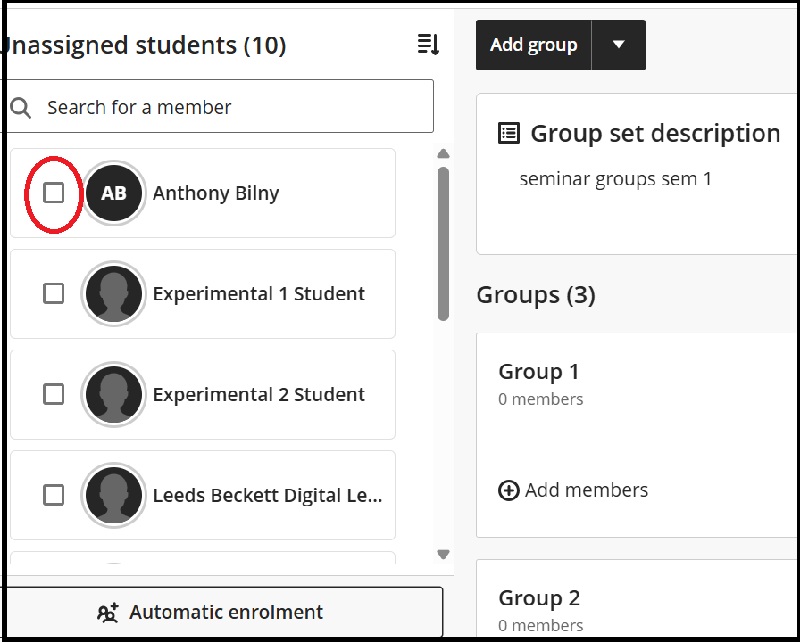
e. To add students tick the box next to the student name and click Assign here in the group you want to add them to:
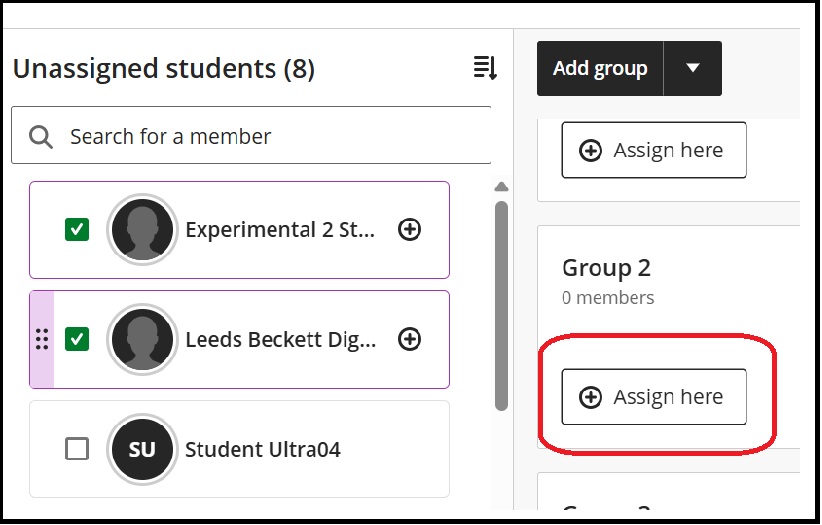
f;. Then the group will display with the students added:
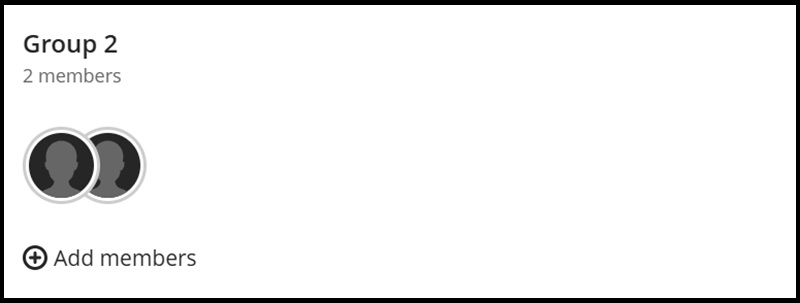
Please note you can also add members to the group by clicking the Add members link (see above).
Manage groups
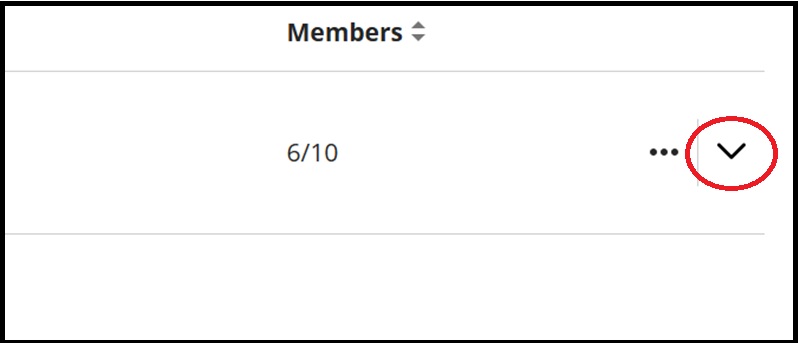
The left-hand side of the Manage groups screen shows you the completed group set and clicking the downward pointing arrow on the right-hand side of the screen (second screen shot) allows you to see all the groups listed under the particular group set:
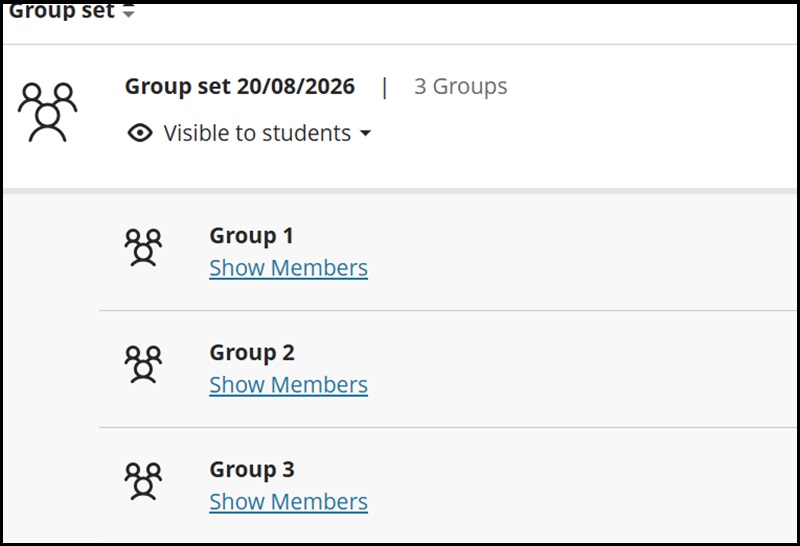
The left-hand side of the expanded Manage groups also can display all the members in the individual group if you click Show members:
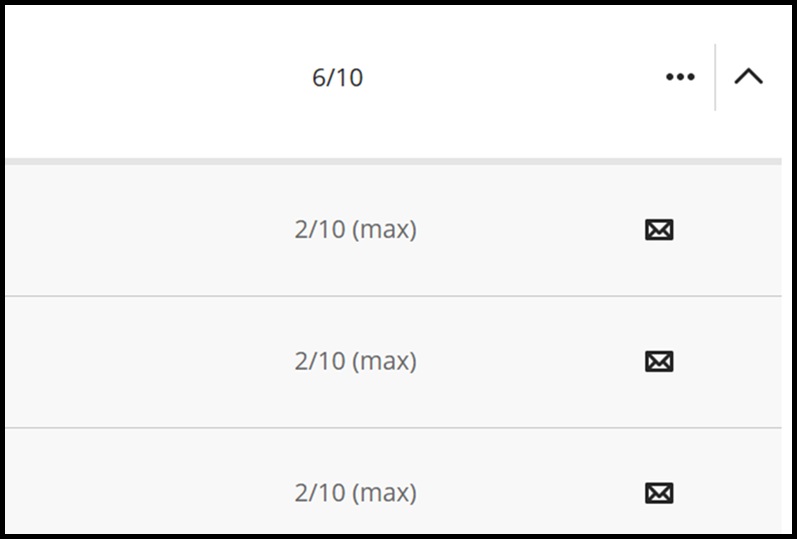
The right-hand side shows the number of students in each group (plus its maximum amount per group). The small envelope icon allows you to message that group:
Message group set
There is also the facility to message the Group set (i.e. all the groups within that set) by clicking the three dots menu as in the above screen shot and selecting the first menu option 'Send message to name of the group set' in our case the name is 'Group set 20/08/2026':
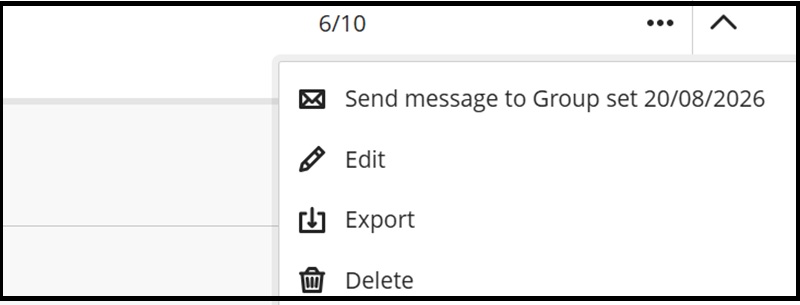
NB this option only becomes available when group set is made visible to students.
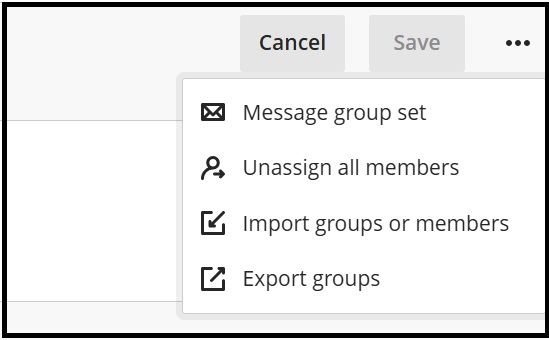
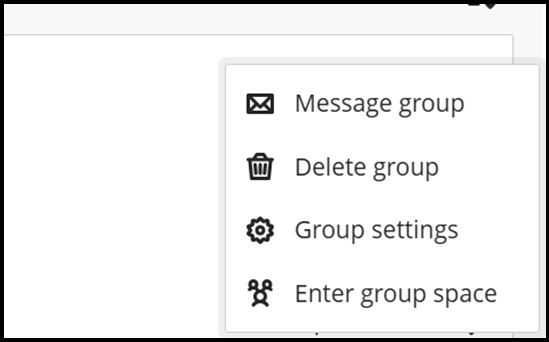
Also within the group set you can message the group set and the individual groups by clicking the three dots menu to the right of the respective group set/group:
Groups within the set and removing members
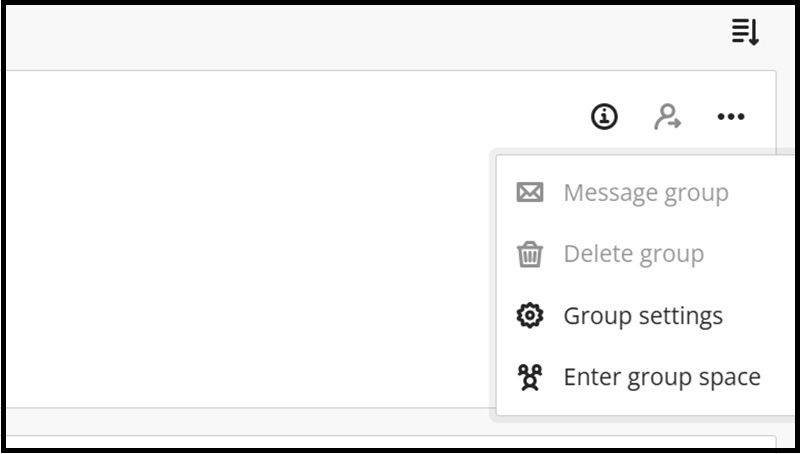
On the right-hand side of the individual group click the three dots menu and Group settings:
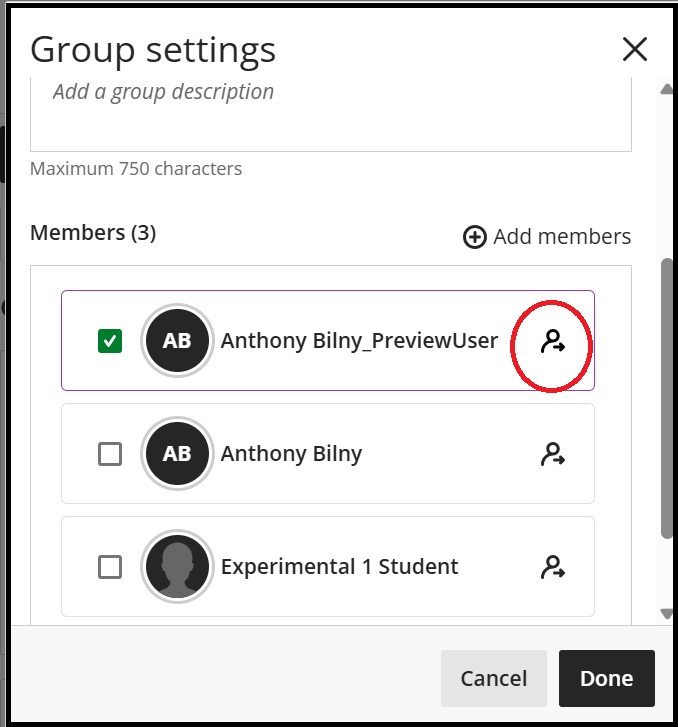
Scroll down to the members list and tick the box next to the member(s) you wish to remove. Then click the small figure with an arrow and then Done:
Automatically assign group set
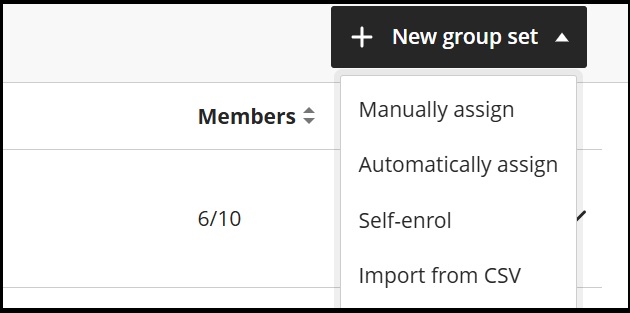
a. Click the New group Set menu as before and Automatically assign:
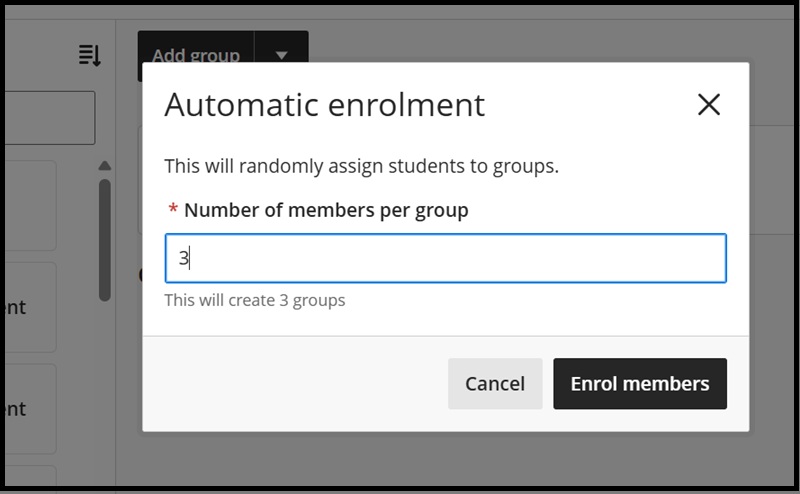
b. Enter number of members per group required and then Enrol members. This revised method (from the previous random assigned group members in Ultra groups) does not let you specify how many groups to create and as entered below it will create 3 groups:
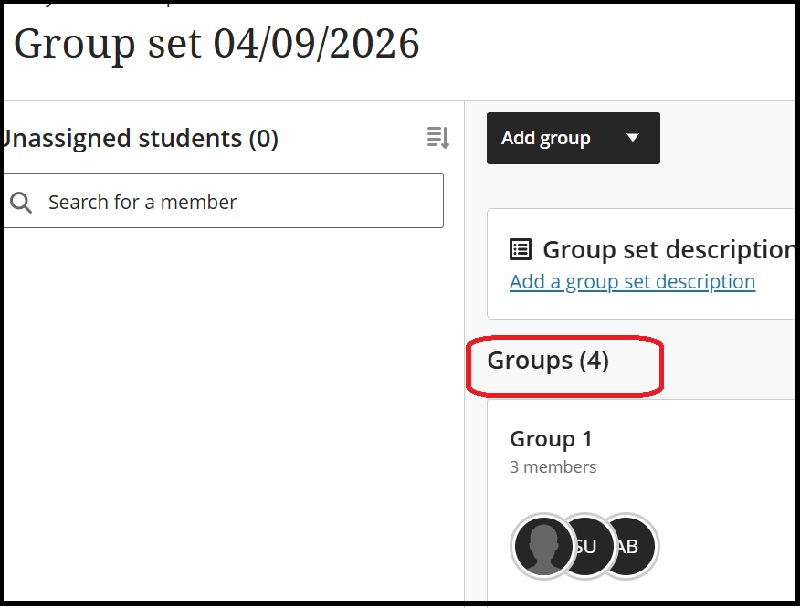
c. The resultant screen below shows that the group set has been created but with four groups however. This is due to the number of students enrolled within the module. As the example shows a test module of 10 students which have been evenly split as two groups of three students and two groups of two students:
As with a manually assigned group you can change the default title and descriptions of the Group set/groups..
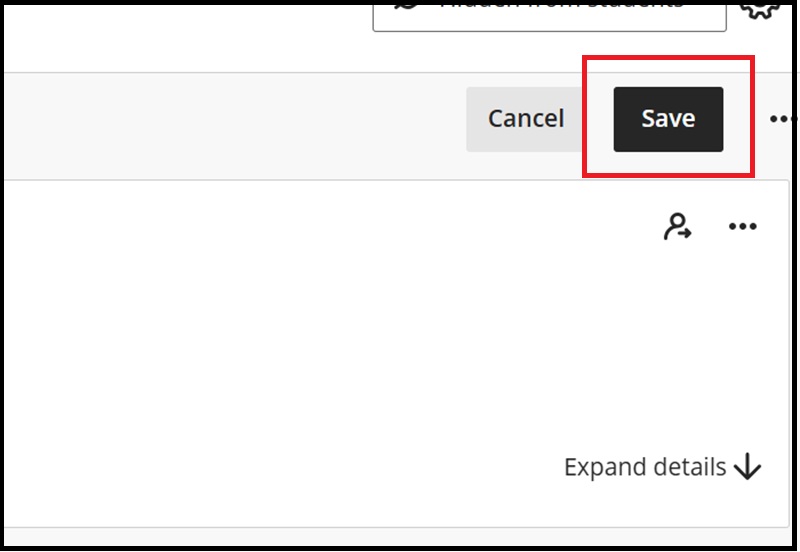
On the right-hand side of the screen click Save and it will then appear in the Manage groups list:
Message group set and groups
Just as with manually assigning students to
Creating self-enrol groups
a. Clicking this option results in opening the Group Settings dialogue box on the right-hand side of the screen:
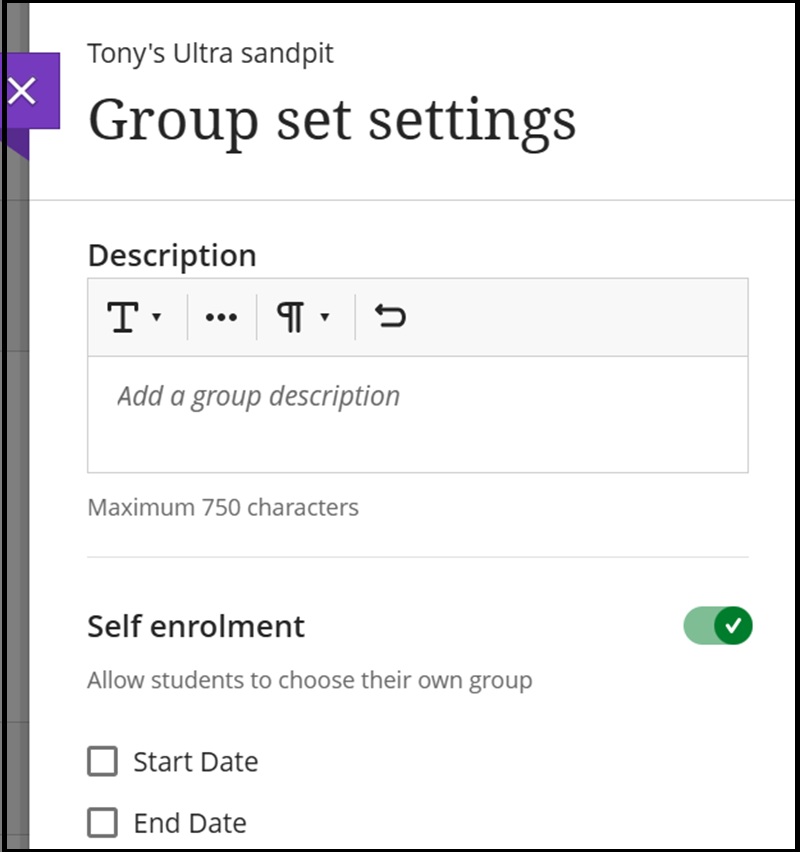
b. You can set start and end dates for a window where students can enrol themselves in. The 'Auto-enrol members after the end date' in the next screen shot is greyed out until you set the start and end dates. The 'Allow members to change groups during enrolment' is selected as a default but you can always turn this off.
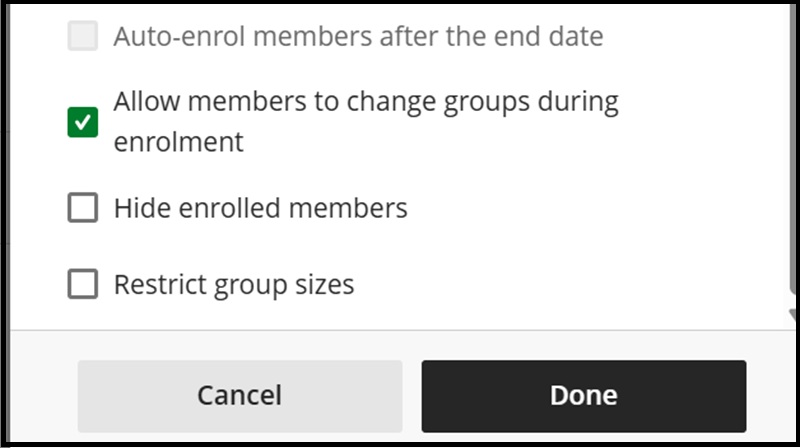
If you require the members of groups to be hidden from each other you can select Hide enrolled members.
Also, as above you can restrict the size of groups. This would be working in conjunction with the previous option of hiding enrolled members. (For example students wishing to join the same group as their friends may result in a large number of students in a particular group).
c. Clicking Save will add it to Manage Groups. By default, self-enrol groups are always visible to students in the Manage Groups list. Creating a self-enrol group will also send an email notification to each enrolled (in the module) student inviting them to join a group within the group set:
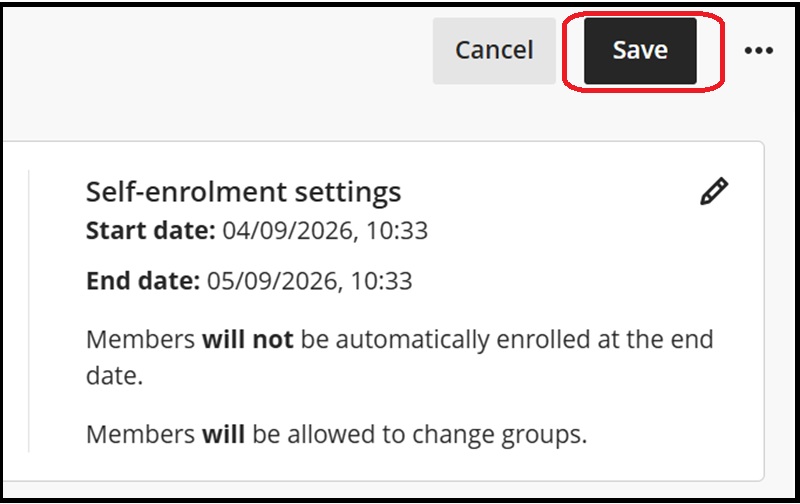
The email will also have a link to a module announcement also created as a reminder for the student to enrol in a group.
Please note currently (as of September 2026) the message that appears after selecting 'Auto enrol after the end date' (see above) is a system error that is being fixed by Blackboard.
Import a group set
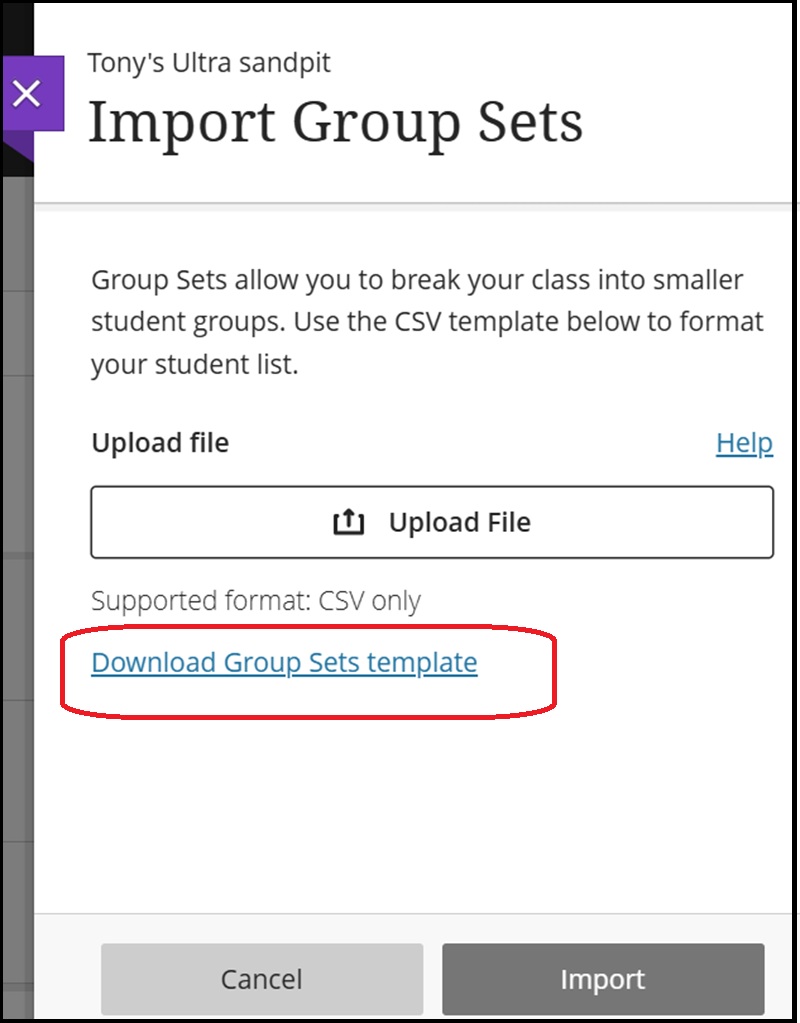
Before importing a group from a .CSV file (i.e. a spreadsheet file comma separated values usually opened in Excel) you will need to download the template provided by Ultra for it.
a. Choose Import from CSV and the Import Group Sets dialogue box should appear. Then click Download Group Sets template
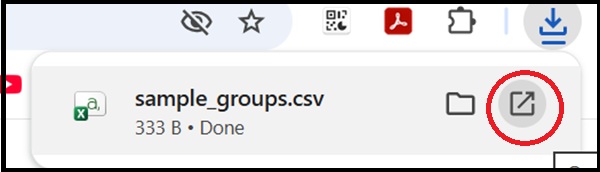
b. As above (shown in Google Chrome) open the downloaded template and it will open in Excel (or your spreadsheet program). Below is an example of the downloaded CSV template in the unedited form - you will need to expand each column to see the example text.
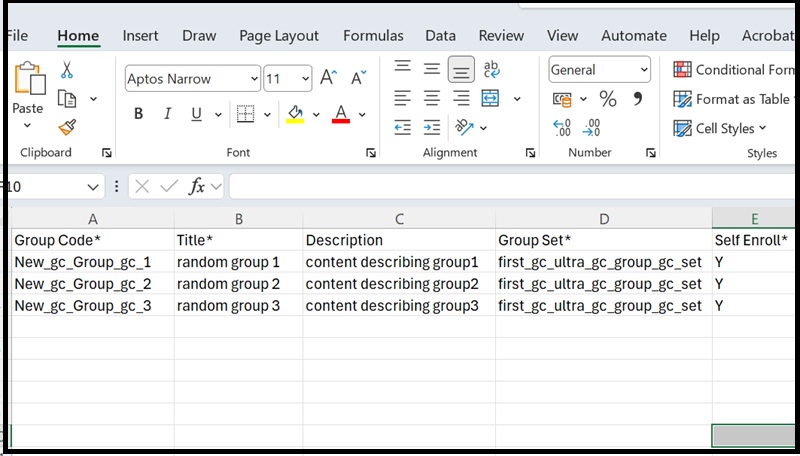
c. Before editing the template, here is an explanation to understand the Columns above.
An asterisk* in the column name indicates essential data.
Column A: Group Code* are unique alphanumeric identifiers used only for import purposes. Group codes provide a unique way to identify each group in case they have the same name. You can assign any group code you want.
In Excel it is easy to create more codes by dragging the corner of the cell.
Column B: Title* add the name of the group within the group set. The Group name should be easy for both students and instructors to understand.
Column C: Description, additional information such as the purpose of the group (for example the Seminar day and time).
Column D: Group Sets* are smaller student groups within the group set.
Column E: Self enrol* change the default as needed from Y to N.
Y = Yes if you want students to be able to self enrol into groups;
N = No if you want to assign students to groups yourself.
d. Save and rename your Group Set template in Excel (keep the same file format as CSV). Below is an example of a completed template file:
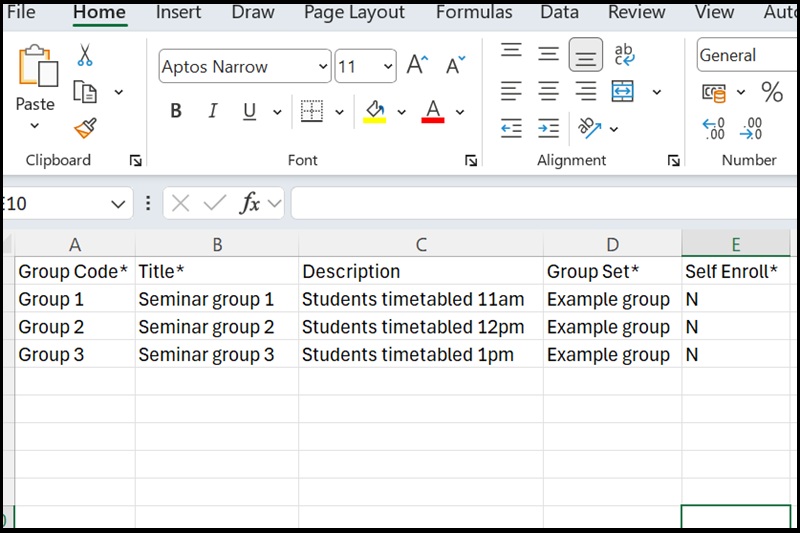
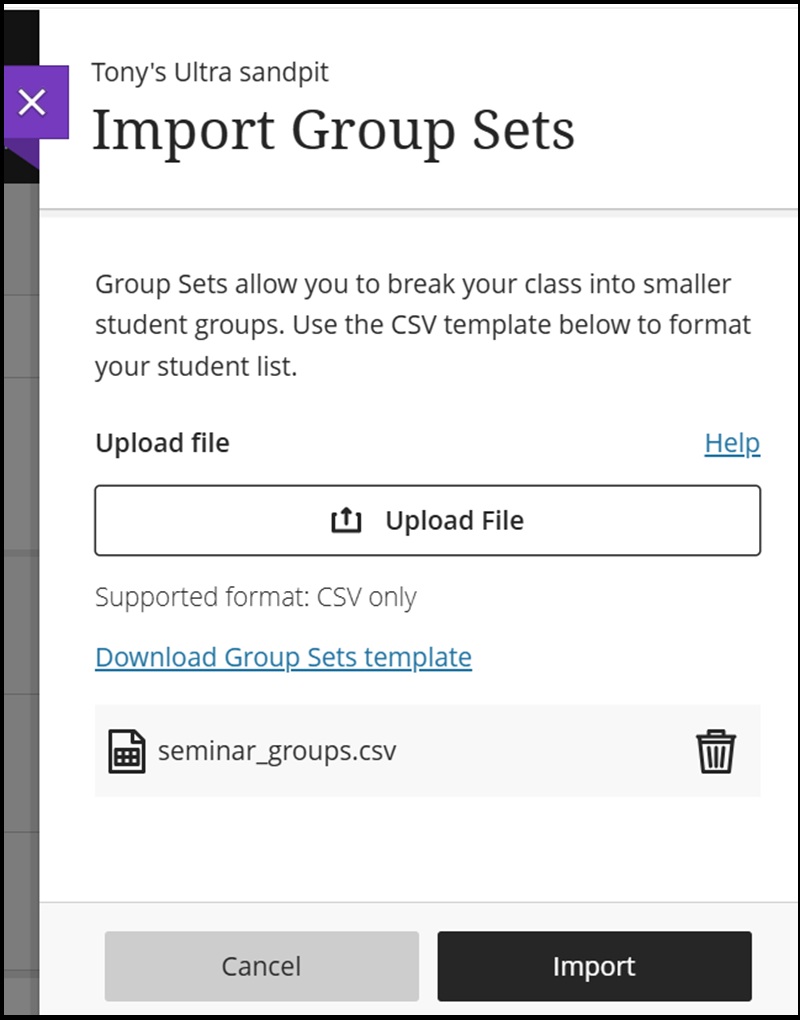
Now you can add your template via Upload File (below shows seminar_groups.csv added) and select Import.
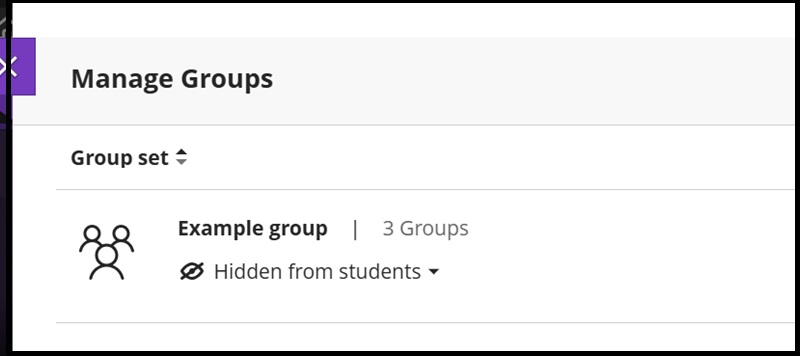
e. You will receive an email when this has been processed - click the link in that. Alternatively you may need to go out and into the module again to check Manage Groups to see if it has completed the upload. Below is the CSV file loaded under the title Example group:
f. Opening it will show the template created as above with the 3 groups and their descriptions and ready to edit further:
Created template files
Please see Export groups to see how to Export created groups to import into Ultra groups.
Exporting groups
Any created groups (including groups imported as a .CSV template and saved as a new group) can be exported through Manage Groups.
a. To Export a group in Manage Groups click the three dots menu on the right-hand side of the group:
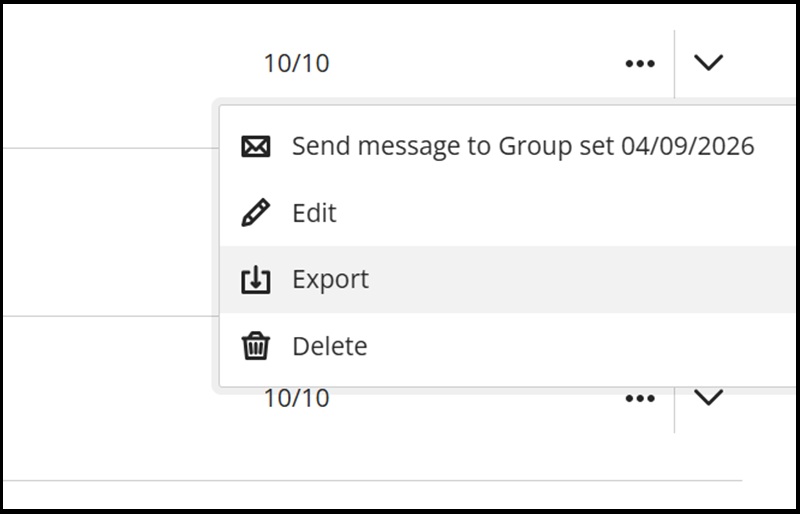
b. Then click Group sets only to export the group set structure as you can see below as a .CSV file. (The procedure for the latter is the same so we will show the group sets example here and a screenshot at the end will demonstrate the members only option.)
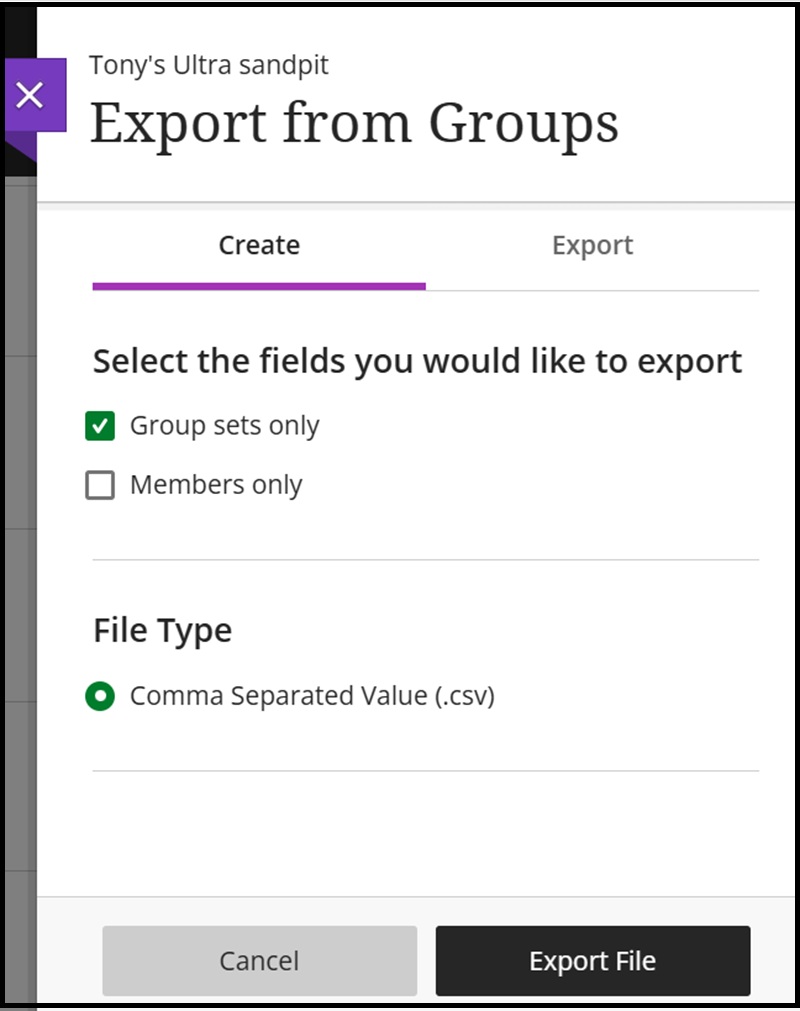
c. Click the Export File button next. This will generate an email that you confirms have created an export file with a link to the Manage Groups section in the module.
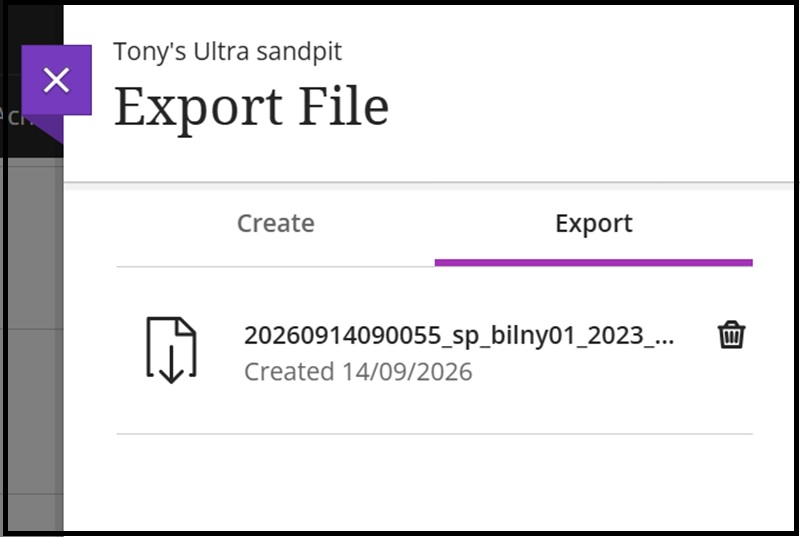
You will need to click the three dots menu of that group and choose Export. Then click the Export tab and the title/link of the newly created export file. The bin icon is to delete the created export file if you wish to start again etc.:
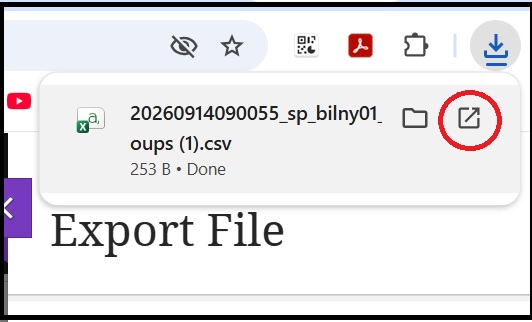
d. In the downloaded section in your browser toolbar (Google Chrome is shown here) open the file:
e. It will open in Excel (or your spreadsheet software alternative):
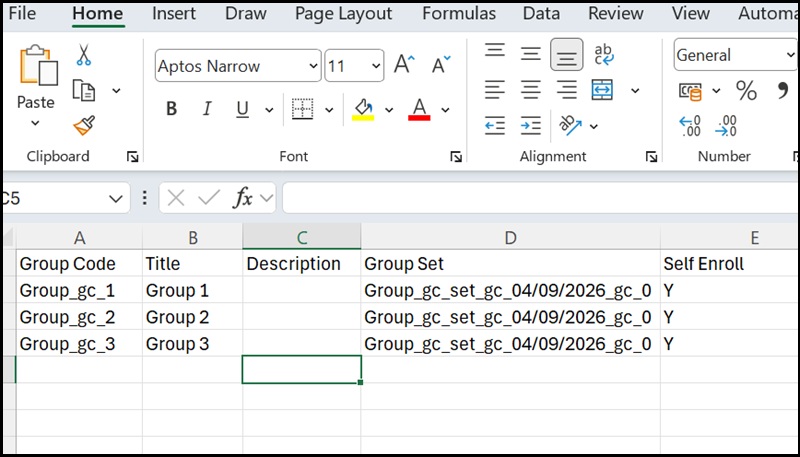
The above example appears like the import template as all groups exported even though created in other ways will appear similar to the above.
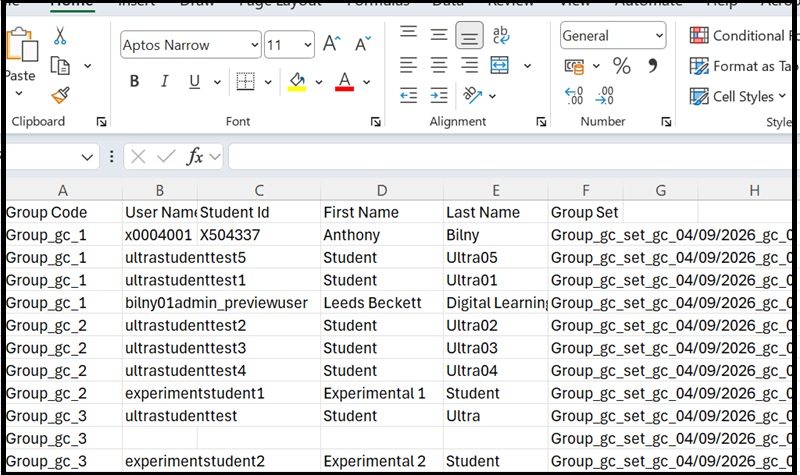
The below screen shot demonstrates what a members only export looks like:
Assessments using groups
Within Ultra you can create assignments (including Turnitin), Tests and Forms which can be set or assigned (Ultra terminology) to created group sets. Selecting individual groups within a group set is not currently available for Ultra assignments but can be selected in Turnitin where you can even create a group after creating the assignment (see the section below).
Assigning groups to assignments, tests and forms
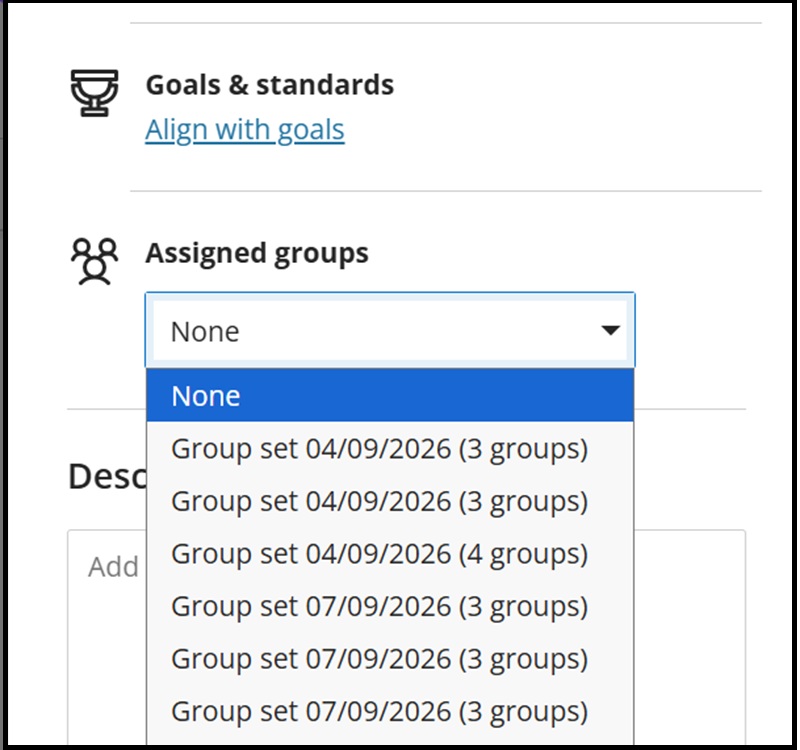
With these options creating groups beforehand will be necessary before you can assign the group(s) to them and the procedure is similar for all of the above.
Assignments tests forms and groups
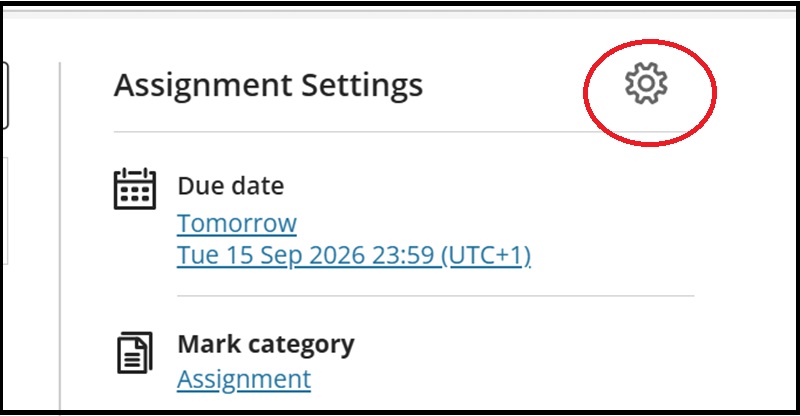
a. When thishas been done create your assignment, test or form and click the cog icon to enter the Assignment/Assessment settings dialogue box:
b. Then scroll down to Assigned groups and select the required group set then Save:
A note on group assignments - submitting them and group members working on them
Only one member per group can submit the assignment but they can grant access to the assignment to other group members working on it.
E.g. If another group member is working on the an assignment, a pencil icon and message appears next to the member's name. They can send a request to the student controlling it (usually given the duty of the final submission) by selecting Take Control. This can either be granted or declined.
Turnitin group assignments
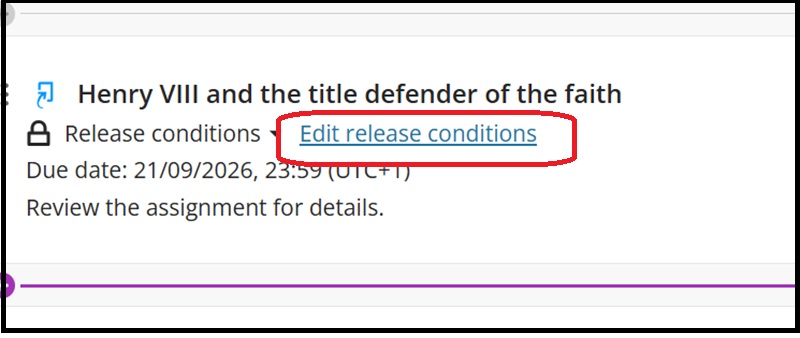
When the above Turnitin assignments have been created you can assign groups to them. As noted above, you assign individual groups within a group set to the assignment (as opposed to Ultra assignments). To do this, in the content area where the Turnitin assignment is located click the Edit release conditions by the assignment link:
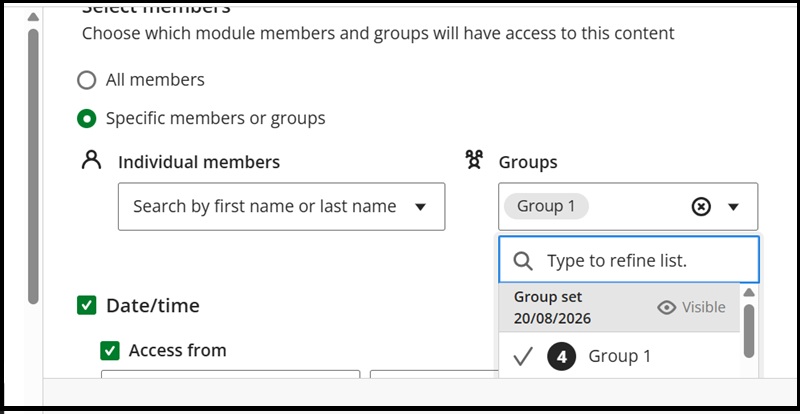
And in there you can select the individual group:
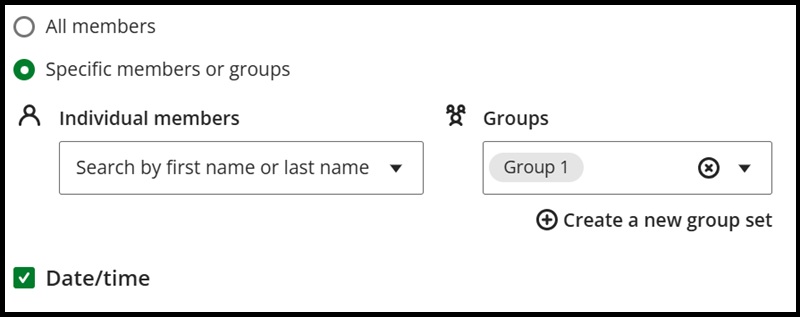
You can also create a new group set here as well:
More detailed guides on Turnitin available here
Discussions
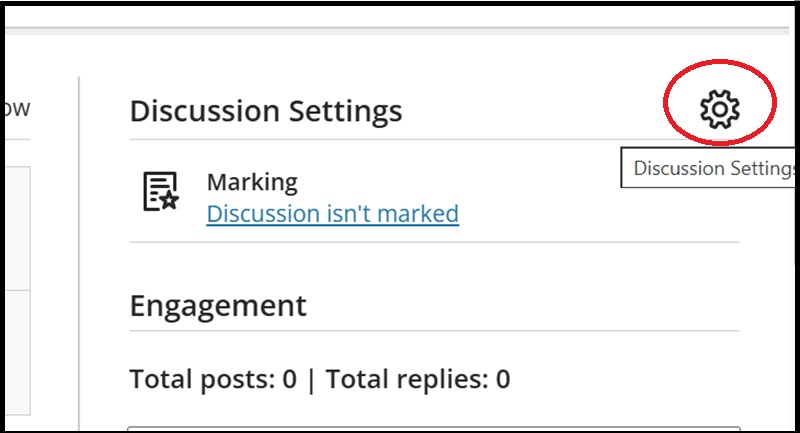
You can also assign groups to a created discussion by clicking the cog icon in Discussion settings:
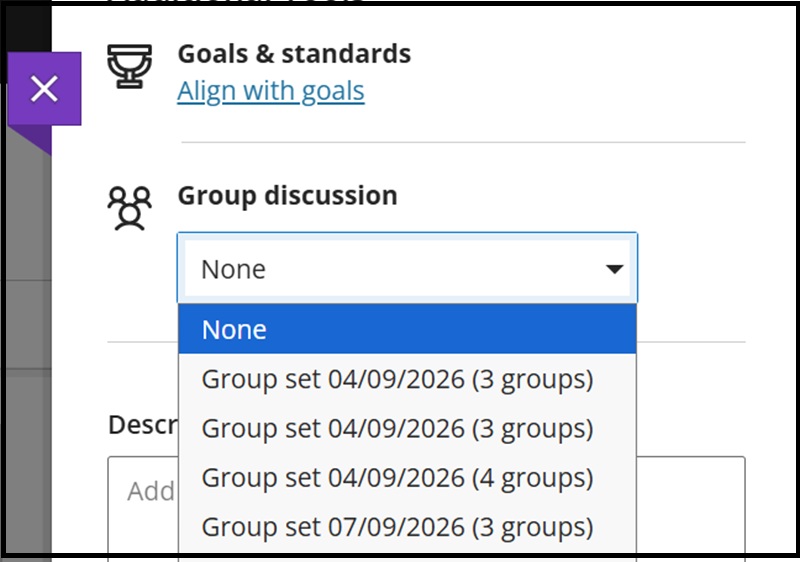
Scrolling down to Group discussion you can then assign a group set: