
Leeds Beckett University - City Campus,
Woodhouse Lane,
LS1 3HE
Creating Module content | Ultra
![]()
Page last updated:
This staff guide shows you how to add content to a MyBeckett Ultra module.
On the module content page of your Ultra module, you can create folders and learning modules to present content in an organised and engaging way. You can also add documents, file attachments, assessments, multimedia and links to websites, discussions, and journals. It is a feature of Ultra that there is more than one way of adding content.
Remember to regularly run the Accessibility Report in your module to check content and remove broken links.
CLT have also created guidance on improving the student experience through better MyBeckett module design.
If you are not teaching on an Ultra module, please refer to our alternative guide to create basic content in MyBeckett Original.
a. From the content page of your module, click the plus icon wherever you want to add content.
![]()
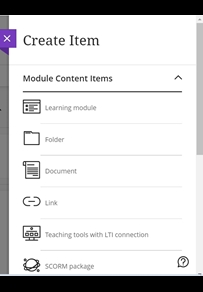
b. Click Create and a panel opens where you can choose the content type you want to add.

c. You can create content items e.g. Learning module, Folder, Document or Link.
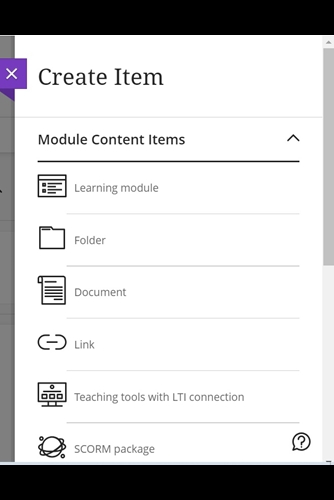
d. You can create Assessments e.g. Test, Assignment, Form and add Participation tools e.g. Discussion, Journal. More information is available in our creating a Blackboard assignment and journals guides.

Explore the next sections for adding different content items.
You can use Learning modules as containers for organised collections of content. This allows students to navigate from one content item to the next without distractions or extra clicks.
You may wish to view the guide on how to convert a folder into a Learning Module.
The following guide shows how to create a Learning Module from scratch
a. From the content page of your module, click the plus icon![]()
b. Click Create and the Create Items panel opens.
c. Click Learning module.
d. Enter a Title for the Learning module. A description and image are optional.
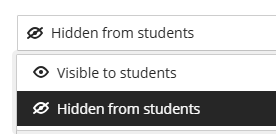
e. By default, the learning module will be hidden to students.
f. Tick Forced Sequence to make students work through the content in order.
g. Click Save.
h. The Learning module is now added to the content page. You can use the plus icon to add further content to the Learning module.
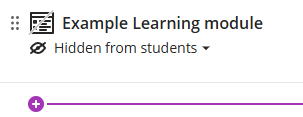
i. When you have finished editing the content, you can make the learning module available to students. Students are notified in their Activity Stream when you add content. You can also apply release conditions, see Blackboard's guide for more information.
j. You can now view a learning module's table of contents by clicking the Contents (right-pointing arrow) link at the top left-hand side of the open module:

This will display a list of the learning module's contents. (To contract the list, click the left-pointing arrow icon):

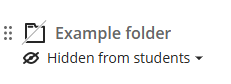
You can create up to two levels of folders to organise your content. Folders are useful for lists of links or content that you do not need students to access in a sequence.
a. From the content page of your module, click the plus icon.
![]()
b. Click Create and the Create Items panel opens.
c. Select Folder.
d. Enter the Title and a Description.
e. By default, the folder is hidden from students.
f. Click Save. The folder will be added to the content page.
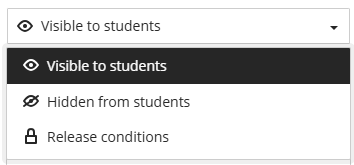
g. When you have finished editing the content, you can use the drop down menu to make the item visible to students. Students are notified in their Activity Stream when you add content. You can also apply release conditions, see Blackboard's guide for more information.
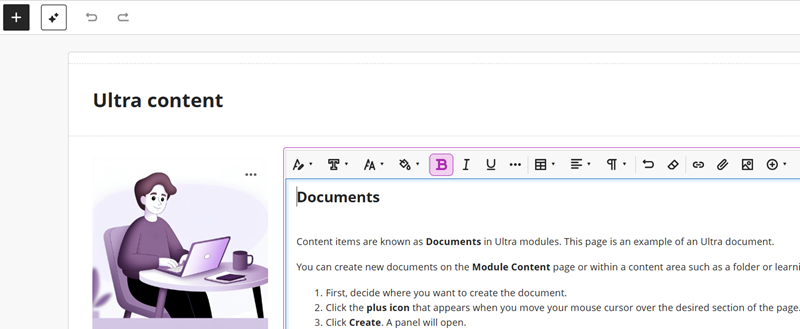
On the content page you can create a document to present a combination of content e.g. introductory text, an audio file and image which when viewed by students will be presented together on one page. You can also add a document to a learning module.
a. From the content page of your module, click the plus icon.
![]()
b. Click Create and a Create item panel will open.
c. Click Document.
d. Add a meaningful Title for the document.
e. Select the type of content block to add to the document:
- Content - add content via the content editor
- Knowledge check -check students comprehensions by creating multiple choice or multiple answer questions
- File upload - upload a file from your computer
- Cloud upload - upload a file from Cloud storage (OneDrive)
- Content Collection - browse the Content Collection and select a file
- Image - add an image to the document
- Convert a file - allows you to add text only from a PDF, PowerPoint or Word file. Content should be reviewed for accuracy
f. Click Save.
Content blocks
Content blocks enable you to design a page containing text, images and other embedded content.
Editing tools are available at the top of the content block. These include:
- Text styles (please make use of these styles to identify titles, headers and sub-headers within your document. This will enable anyone using a screen reader to navigate your document more easily as these styles contain inbuilt navigation).
- Font
- Font size
- Colour picker
- Emphasis (bold, italics, underline)
- Other text options (strikethrough, subscript, superscript, code snippet)
- Create or edit a table
- Alignment options
- Lists
- Undo
- Clear format (very useful if you have copied and pasted text).
- Link
- Attachment (use this option to locate a file saved on your computer that you want to share).
- Image
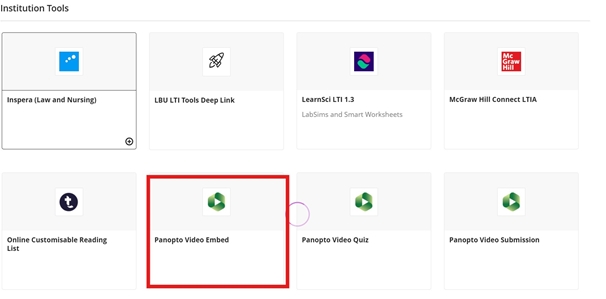
- Insert content (this is where you will find options to add equations and embed media). If you are trying to embed a Panopto video, you will find this option if you click Other Content & Tools, then Panopto Video Embed.
Resize and move content blocks
You can resize or move content blocks within the document.
- Each row includes a menu with options to move or delete
- Each block includes a menu with options to edit, move, resize or delete

Document settings
You can allow students to contribute to a discussion within the document.
a. Click the cog icon in the top right of the page.

b. The Document Settings panel will open, tick Allow class conversations.
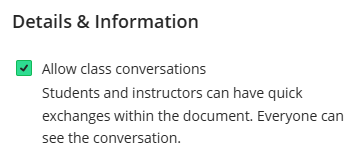
c. Click Save.
d. A new class conversations icon will appear next to the cog icon, click to access the conversations.

e. When anyone contributes to the conversation, a bubble icon will appear next to the document on the content page.
![]()
For more information see Blackboard's guide to class conversations.
Knowledge checks
You can test students' understanding of the content using multi choice or multiple answer questions in a knowledge check.
Document visibility
When you have finished editing the content, you can make the document visible to students. Students are notified in their Activity Stream when you add content. You can also apply release conditions, see Blackboard's guide for more information.
a. From the content page of your module, click the plus icon.
![]()
b. Click Create and the Create Items panel opens.
c. Select Link.
d. Use the tabs at the top of the page to choose the type of link to add to your content page:
- Web link - to link to external websites
- Module link - to link to other module content

e. Fill in the relevant fields for the link:
- Web link - requires display name and link URL
- Module link - use the keyword box or categories to locate the relevant content, click Search and select content to link to
f. Click Save.
You can import a SCORM package (i.e. upload it from your device or content collection). A SCORM package is content that has been compressed into a ZIP file and is similar to a learning module. If you are unsure about if a SCORM is compatible please contact the Digital Learning Service.
a. Create Content using the plus icon.
b. Select SCORM package from the content items list.
c. If the SCORM package is set up to use Grade Centre then select the due date etc.
d. Before allowing students to access please ensure it is presenting correctly using student preview mode.
You can create learning modules with the help of the Blackboard AI Design Assistant.
From the content page of your module, click the plus icon.
![]()
Click Auto-Generate learning modules
![]()
NB This uses Blackboard's AI Design Assistant and as you will see below there is a warning to check the generated content
Add a topic into the Description box.
Select Module items - as the message notes you can add items from the module to shape the resultant learning module choices.
The Title prefix is a drop-down menu that includes Week, Chapter Unit etc. For example, choosing Week will prefix the module with Week 1.
Include images - you can choose to not include images by unticking the check box.

The default settings tailor how complex the learning module will be and the number that will be generated. Complexity here is the educational level (e.g. secondary education, graduate level). Advanced options is a setting for choosing another language.

Then click the Generate button. This will result in a number of learning modules on the topic you entered into the Description box. To insert one click the check box to the left of the the learning module title and then click Add to Module:

The selected learning module will be added to the content page. However, only the opening paragraph and image (which you can edit) are added as you will have to build the other content that will follow it.
You can upload files from your computer and/or OneDrive.
a. From the module content area, click the plus icon.
![]()
b. Click Upload from the menu options.
c. Uploading a document file from your computer. Please note: Do not upload any multimedia files into your module as there is a storage limit, these will need to be uploaded into Panopto Video Embed within the module tools.
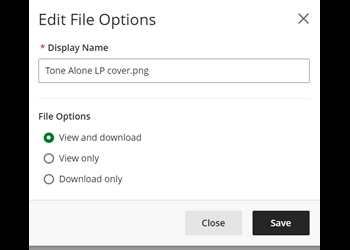
When you click on Upload, it will go straight to your computers local device's dialogue box - in the list of options of storage places on your computer, find the file saved on your device, select it and click Open.
d. The Edit File Options box opens, edit the file name, and select the View and download this is the recommended setting, rather than View Only and Download Only to ensure accessible for all.
The benefits of embedding videos rather than using a link are:
- Attach your PowerPoint presentation slides to the document page for students to download
- Add multiple videos to the same content page
These steps show you how to embed a Panopto Video into a Document.
a. From the content page of your module, click the plus icon.
![]()
b. Click Create
.c. Choose Document and add a Content block

d. Select the plus icon from the text box tool bar.

e. There are several options to select for Panopto Video. Select Panopto Video Embed (Note: guides for the other options are under development.)
- Panopto Video embed - choose from list to embed a video (Select this option).
- Panopto Video Quiz - upload or record/create quiz.
- Panopto Video Submission -Student multimedia assessment provides an option for them to upload and/or record a video to the module.
- Panopto Video Folder - view videos under the module folder and also where you can create upload videos (Note: This will not be listed if you have already added to your module).
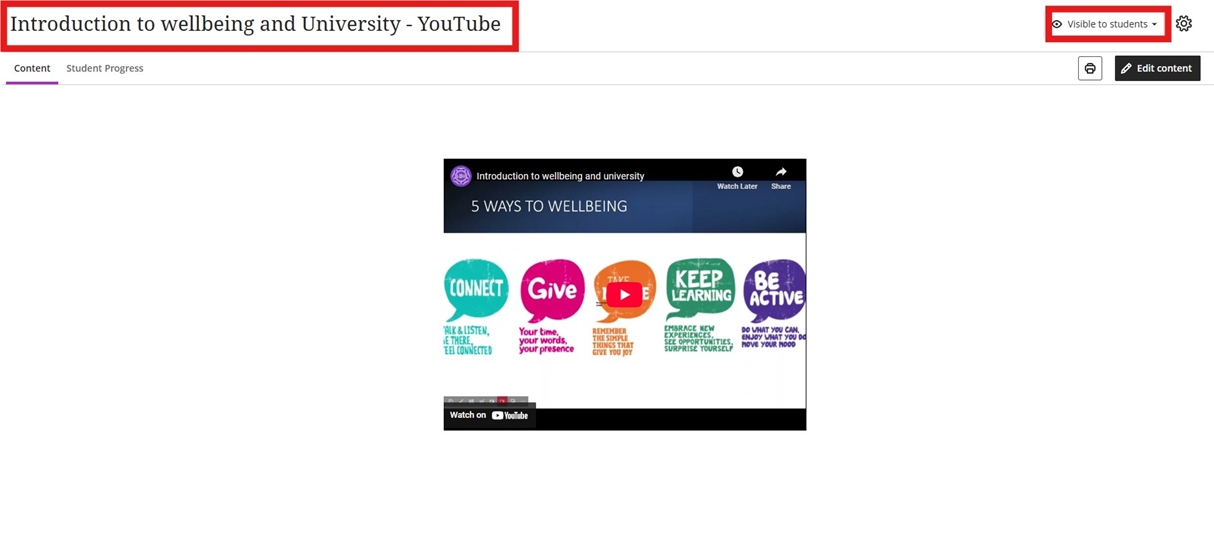
You can add YouTube Videos into Ultra Documents by following these steps:
a. Create
![]()
b. Select the content Item: Document
c. Now select the type of content block to add: choose Content

d. Select the Plus icon in the tool bar and select YouTube video
![]()
e. Search using the video title and select
f. Accept the setting By default the option is set to display inline.
g. Save
h. Edit the name of the content document and make visible to students
i. Close (purple cross)
a. In a MyBeckett Ultra Module or Community, click Create. The purple plus icon, wherever you want to add content).
![]()

b. Click Learning Object Repository.
c. Search the Learning Object Repository for the content that you want to use.
d. Tick the checkbox to the left of the item. You can select multiple items if you wish.

e. Click Insert Object(s).
f. The content item will appear in your Module/Community. You can click and drag to move it around the content page.

Please note, you will not be able to edit LOR content within your Module/Community as it is centrally managed by Library and Learning Services. LOR items contain the description 'This item is managed by your institution' compared to regular, editable items.
Known issue: If you copy an LOR item from module to module, they become 'Hidden from Students' and can't be edited back to visibility. Please upload LOR objects into a module directly instead of copying them from modules.
You may find the following guides useful.
