
Leeds Beckett University - City Campus,
Woodhouse Lane,
LS1 3HE
Learning Modules
Page last updated:
A learning module is a collection of content and activities with its own built-in navigation that students can work through in sequence.
You might consider using one to structure your module content around specific teaching weeks/topics.
- The benefits of Learning Modules is it allows you to provide structured learning content.
- You can decide if students can progress per page or see the full contents in a list and they choose how to view the learning material in a way that meets their learning style.
- You can create several Learning Module Shells for different topics.
a. Before you begin, you will need to add the learning module tool link to the menu and remember to ensure it is visible when your content is ready otherwise it will not display:
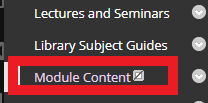
b. Click the link to open the Module Content link (see above image).
c. Now build your content. The following specific content types can be added to a Learning Module - see the image below, Learning Module (highlighted in red box) in a content area. You can create Content Folders but the index shows the learning pathway similar to the Table of Contents.
Content types:
- Item (the best method to embed videos in Panopto and Youtube, attach files and insert)
- File (attachments that are downloaded also can be attached to content items to keep everything in one section)
- Web links (insert a web link, but also can be added into a content item to keep everything in one section)

Communication and Collaboration Tools
Assessment
a. Navigate to the content area in which you want to create the Learning Module.
b. Hover your mouse over Build Content. Under Create, click Learning Module.

c. Enter a relevant Name and description for the Learning Module.
d. Under Learning Module Options, select Yes or No if you want to:
- Enforce Sequential Viewing of the Learning Module (if Yes, students must view the content in order. This tends to become annoying if they want to view the Learning Module several times as they have to go through it from the beginning every time.)
- Open in New Window (we recommend setting this to No, so that students are not confused by the navigation.)
e. Under Standard Options, select Yes to Permit Users to View this Content. (Choose No if you're still building it and you want to make it available later.) You can also Track Number of Views.
f. Under Table of Contents, click Yes if you want to Show Table of Contents to Users. Under Hierarchy Display, choose how you want the content to be prefixed.
g. Click Submit.

h. When you’ve created it, a Learning Module icon appears. Click the link to open it and view the contents using Student Preview.

Add Content and link to it in the menu
a. Click on your Learning Module to enter the shell. The introduction section of this guide lists the tools that can be used in learning modules to create engaging content.
b. When you link to the different sections folders in a Learning Module from the menu. Add the module link to the learning module folders by choosing Module Link and in the pop up scroll to the Module content folder and drill down to the folder you want to link to), for instance Week 2 for example, you can link to the relevant section.
Content Collection
a. The rest of this guide, shows you how to add a file which has previously been uploaded into MyBeckett and therefore, will be available from within Content Collection (You can learn more about using Content Collection that you may have uploaded in the module previously).
b. Hover your mouse over Build Content and select the type of content you want to add.
c. Type a Name.
d. Under Find File, click either Browse My Computer or Browse Content Collection to upload/add a file.
e. Select the file then click Open.
f. You can change the Colour of the text. Don't Open in a New Window.

g. Make sure Permit Users to View this Content is set to Yes if you want the content to be available to your students. If you're creating the entire Learning Module before making it live, it's easier to set all the individual components to Yes, but keep the overall shell set to No. Then you only have one permission to change when you make it live.
h. Set and Date and Time Restrictions, if necessary.
i. Click Submit.
j. Continue to add additional content to the Learning Module and a contents menu will grow in your Learning Module, you can choose different content types as described at the introduction of this guide.
k. When complete ensure you make the module content link visible in your menu (see introduction above).
